Learn expert tips and step-by-step techniques for drilling holes cleanly and precisely in wood, metal, and more with Vast’s reliable tools.
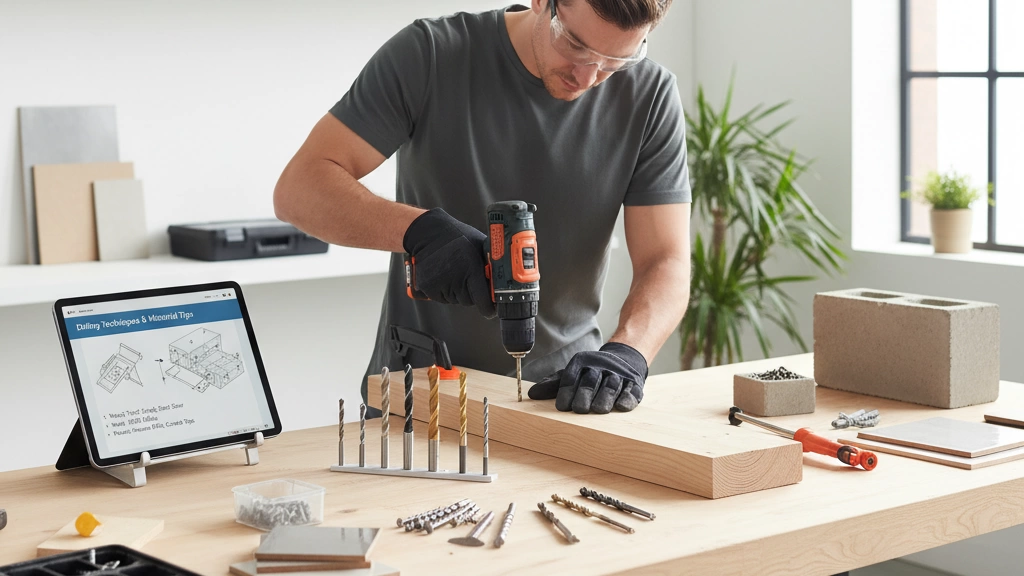
Drilling holes might seem straightforward, but anyone who’s ever battled with a cracked edge or a wandering bit knows it’s an art—and a science. Getting clean, precise holes is the difference between a project that wows and one that wobbles. Whether you’re hanging shelves, assembling furniture, or diving into metalwork, mastering the right technique and tools is a game changer. In this guide, we’ll uncover everything you need to know about drilling holes—from selecting the perfect drill bits to avoiding common pitfalls—so you can tackle your next project confidently and effortlessly. Let’s get drilling!
Understanding the Basics
Drilling holes might seem straightforward, but there’s real science behind it. Different drill bits are designed to match materials like wood, metal, or concrete. Using the right bit matters because materials react differently — a wood bit cleanly cuts fibres, while a masonry bit grinds through tough concrete. Understanding this helps prevent damage and ensures clean holes every time.
Before diving in, avoid common mistakes like pressing too hard, which can break the bit or damage the material. Also, skipping pilot holes often leads to splits or misaligned holes. Take your time—precision beats brute force.
Safety is non-negotiable. Always wear proper Personal Protective Equipment (PPE): safety glasses to shield your eyes, ear protection against loud drills, and gloves if handling rough materials. Set up your workspace with good lighting and keep your surroundings clutter-free. Remember, a tidy spot helps avoid accidents and lets you focus better.
Essential Tools and Materials for Drilling Holes
Choosing the right tools makes all the difference when drilling holes. First up, cordless vs. corded drills. Cordless drills offer convenience and mobility—great for quick jobs or working outside where outlets aren’t handy. But if you’re tackling heavy-duty projects or want consistent power, a corded drill often performs better and doesn’t run out of juice mid-task.
Next, pick the right drill bit type for your material:
- Wood drill bits: Designed to make clean wood holes, often with sharp tips to prevent splintering.
- Metal drill bits: Usually made of high-speed steel or cobalt for tougher jobs, these bits handle drilling in metal with precision.
- Masonry bits: Specially built for drilling into concrete, brick, or stone.
- Hole saws: Ideal for larger holes, like for pipes or wiring.
Grab the right accessories too. A precision drilling jig can keep holes straight and consistent, while a backer board helps avoid tearout on delicate surfaces. Don’t forget bits like countersinks or step drills for more advanced needs.
Lastly, consider your budget. Quality drill bits and tools cost more but last longer and deliver better results. Cheaper options might work for light tasks but expect faster wear and replacement. Investing in solid gear usually saves time and money in the long run.
Step-by-Step Techniques for Drilling Holes
Marking and Measuring for Accuracy
Start by marking your drilling spots clearly using a pencil or centre punch. Accurate measurement is key to avoid mistakes. Use a tape measure or ruler to double-check spacing and alignment before drilling.
Drilling Pilot Holes to Prevent Splitting
Pilot holes help guide your drill bit and stop wood from splitting, especially near edges. Use a smaller drill bit than your screw or fastener size. This simple step makes your project cleaner and stronger.
Core Drilling Method with Proper Pressure and Speed
When drilling larger holes, like with a hole saw, keep a steady, moderate pressure. Don’t push too hard—let the bit do the work. Adjust drill speed based on material: slower for metals and concrete, faster for wood.
Advanced Techniques
- Large holes: Use hole saws or step drill bits. Keep the drill straight and move slowly to avoid bit damage.
- Grid drilling: For even spacing, use a precision drilling jig or mark out a grid with a square.
- Angled drilling: Clamp an angled guide or use a drill with an adjustable base to hit tricky angles precisely.
Material-Specific Tips
- Wood: Use sharp bits like brad-point or Forstner bits for clean wood holes. A backer board can reduce splintering on the exit side.
- Metal: Use high-speed steel or cobalt bits, and apply cutting oil to reduce heat. Drill at a low RPM to avoid dulling the bit.
- Concrete: Use a hammer drill with masonry bits. Keep the drill perpendicular, and clear dust often to maintain cutting efficiency.
Clear markings, correct pilot holes, and adjusting your speed and pressure based on the material will ensure your holes are clean and precise every time.
Troubleshooting Common Challenges When Drilling Holes

Drilling holes isn’t always smooth—there are some common issues you might encounter. Here’s how to troubleshoot them quickly:
Preventing Tearout and Splintering
Tearout occurs when wood fibres splinter around the hole. To avoid this:
- Use a backer board placed behind the drilling surface to catch splinters.
- Drill a pilot hole first with a small bit.
- Reduce your drill speed (rpm) when finishing the hole for a cleaner cut.
- Consider using special drill bits designed for clean wood holes.
Bit Maintenance: Sharpening and Replacement
Dull bits cause uneven holes and generate more heat. Keep bits sharp by:
- Sharpening bits with a simple file or drill bit sharpener.
- Replacing worn-out bits—quality bits last longer but still wear down.
- Cleaning bits after use to remove debris and prevent corrosion.
Fixing Uneven Holes and Alignment Issues
If your holes aren’t straight or line up poorly:
- Use a precision drilling jig or clamp for stability.
- Double-check measurements before drilling.
- Mark holes clearly with a pencil or punch.
- Drill pilot holes to keep bigger bits on track.
Managing Bit Overheating with Lubrication and Breaks
Overheating ruins bits and can damage materials, especially metal. Prevent this by:
- Applying cutting oil or lubricant when drilling metal.
- Drilling in short bursts, giving the bit time to cool.
- Using the right drill speed; slower rpm for metals, faster for wood.
- Avoid forcing the drill—let the bit do the work.
By staying on top of these challenges, you’ll get cleaner, more precise holes every time.
Pro Tips for Efficiency and Precision in Drilling Holes
To get the job done right and fast, here are some pro tips for drilling holes with efficiency and precision:
Use Speed and Feed Charts
- Match your drill’s RPM (rotations per minute) and pressure to the material you’re working with.
- For example, wood needs a higher speed but less pressure, while metal requires slower speeds and steady force.
- Using the right speed reduces wear on your drill bit and keeps holes clean and accurate.
Use Jigs for Consistent Drilling
- A precision drilling jig helps you drill multiple holes in the exact spot, every time.
- This is especially useful for projects like dowel joints or picture frames where alignment matters.
- Jigs keep your work steady and prevent slipping, saving time and frustration.
Measure Success and Fit-Test Holes
- Always double-check hole size with the hardware or fastener you’re using.
- After drilling, test the fit before moving on—this prevents mistakes that could ruin your workpiece.
- Pilot holes are handy here to guide larger drill bits perfectly.
Eco-Friendly Drilling
- Use lubricants and cutting oils sparingly—only when drilling metal or concrete—to reduce waste.
- Opt for high-quality bits that last longer, so you don’t keep tossing worn tools.
- Clean up metal shavings and wood dust properly—recycle or dispose of them according to local guidelines.
These straightforward tips help you drill smarter, not harder, and ensure your holes look professional every time.
Project Spotlights: Drilling Holes for Every Skill Level
Beginner: Simple Wall Shelf Drilling
Starting out, drilling holes for a wall shelf is a great way to practise accuracy and using pilot holes. Use a cordless drill with a standard drill bit to make clean holes in drywall or wood studs. Mark your measurements carefully, and don’t forget to use anchors for a secure hold.
Intermediate: Dowel Joints for Picture Frames
Moving up, making dowel joints requires precise drilling to align the holes perfectly. Use a drill with a precision drilling jig to keep holes consistent in size and depth. Drill pilot holes first to avoid splitting the wood, and use the right size drill bit for your dowels.
Advanced: Metal Bracket Installation with Step-Drilling
For metal bracket installation, step-drilling holes is key to clean, accurate results. Use a set of stepped drill bits suited for metal drilling to start small and enlarge the hole gradually, reducing heat and wear. Maintain the right rpm for drilling metal and apply lubrication to keep bits sharp. This technique helps avoid common issues like bit overheating and uneven holes.
Visual Aids for Project Results
Whenever possible, use guides, templates, or backer boards to improve drilling precision. Visual aids make it easier to replicate projects, get clean wood holes, and avoid splintering. They also provide a clear view of your progress and final alignment.
These projects cover a range of skills that help build confidence and improve your hole-drilling across different materials and methods.
Maintenance and Upkeep for Drilling Holes
Keeping your drill bits and tools in good shape saves you time and money. Here’s how to clean and store your equipment properly:
- Clean after use: Remove dust, wood chips, and metal shavings from bits and drill bodies using a soft brush or cloth.
- Store in a dry place: Avoid moisture to prevent rust. Use a dedicated drill case or toolbox with compartments.
- Lubricate metal bits: Occasionally apply a light oil to metal bits to keep them sharp and rust-free.
To Extend bit longevity:
- Sharpen dull bits as soon as you notice a drop in performance.
- Use the right drill speed and pressure for your material to reduce wear.
- Avoid overheating by taking breaks during long drilling sessions.
When to upgrade your drilling kit:
- Bits that can’t be sharpened any more or are damaged.
- If your drill regularly struggles with materials you work on.
- New technology, like brushless drills or improved battery life, can boost your efficiency.
- Investing in quality bits and tools pays off in better results and less frustration.
Keeping your tools clean, sharp, and updated will make drilling holes easier and more precise every time.