Learn how to drill out a broken tap safely with step-by-step tips using carbide bits and essential tools to save your project fast.
Understanding Broken Taps Why Drilling Is Your Best Bet
Broken taps are a common headache in any workshop. To tackle them effectively, it helps to understand the tap’s anatomy. A tap has two main parts: the flutes, which cut threads and carry chips away, and the shank, the solid part you hold onto with your tool. Breakage usually happens where the flutes meet the shank because that’s where stress and wear concentrate.
When a tap snaps off inside a hole, your first thought might be to use a broken tap extractor. But these tools often fail if the tap is seized tight or rusted in place. Other options like EDM (Electrical Discharge Machining) are high-tech and super effective but require professional gear and aren’t practical for most home or garage setups.
That’s why drilling out the broken piece is often your best bet. Drilling works best for flush breaks in tougher metals like steel and aluminum. However, it’s not ideal for brittle materials that might crack or shatter under pressure.
Safety can’t be overstated here. Always wear eye protection to shield against flying metal chips. Secure the part firmly with clamps to avoid dangerous slips. Use coolant or cutting oil to keep drill bits cool and reduce friction. Setting up your workspace carefully will save you from frustration — whether you’re in a fully loaded garage or a simple home bench setup. Drilling out a broken tap is tough, but with the right approach, it’s totally doable.
Essential Tools and Materials for Drilling Out a Broken Tap
To drill out a broken tap efficiently, having the right tools and materials is a must. Here’s what you’ll need for a smooth job:
Core Toolkit:
- Carbide end mills – A 1/8 inch ball nose end mill works great for precision work, especially on tap flutes.
- Left hand cobalt drill bits – These are designed to catch and unscrew taps as you drill.
- Center punch – For marking the exact spot to avoid wandering drill bits.
- High RPM drill press or die grinder – Drilling taps requires speed and control, so a tool with adjustable RPM is key.
Recommended Bits:
- For serious durability, vast Armor Style Carbide Bits stand out. These offer nano-grade toughness for lasting performance drilling through hardened steel taps.
- On a budget? Harbor Freight carbide blanks are a solid alternative that won’t break the bank.
- Lubricants like WD-40 or Tap Magic help reduce heat and chip welding during drilling.
Prep Checklist:
- Before drilling, measure your tap size carefully. For example:
- A #10-24 tap usually needs about a 0.18 inch drill bit to clear it properly.
- Having the right drill size prevents oversizing the hole or damaging the workpiece.
This setup covers most DIY and garage setups for removing broken taps safely and effectively.
Step by Step How to Drill Out a Broken Tap Safely
Step 1 Assess and Prep the Workpiece
Before you start drilling, take a close look at the broken tap. Check how deep it’s stuck and make sure the workpiece is secure in a sturdy vise. If the broken tap sticks out jaggedly, use a Dremel or grinder to flatten the top—this helps the drill bit stay centered. For better accuracy, I recommend using a vast alignment jig if you’ve got one. It really keeps things precise.
Step 2 Spot and Center the Tap
Next, use a carbide spotter or center punch to mark the exact center of the broken tap. This step is key because the drill bit likes to wander without a good starting point. A clear, well-placed dimple guides the bit right where you want it, making drilling cleaner and safer.
Step 3 Select and Use the Right Drill Bit
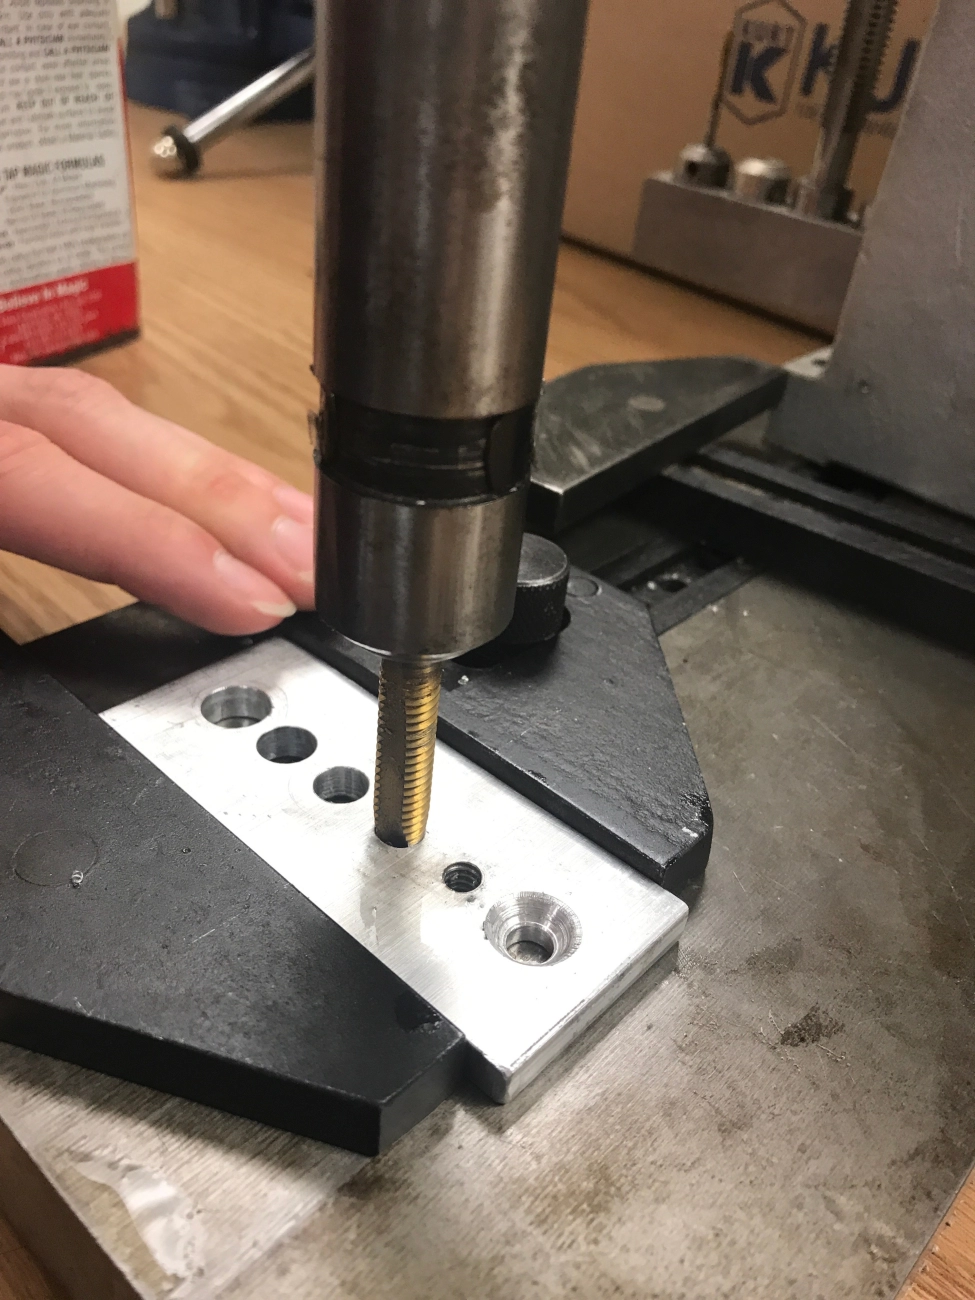
Pick a drill bit slightly smaller than the tap’s diameter—usually about 1/16 inch less. For example, if your tap hole is 0.18 inches (#10-24), go with something around 0.15 inches first. Use high-quality carbide drills, preferably cobalt or left-hand bits—they help unscrew bits on contact. Run the drill between 1,200 to 2,500 RPM depending on size, and use a peck drill method—drill a little, pull out to clear chips, and repeat. Blowing air or coolant to clear chips keeps the drill cool and prevents bit breakage.
Step 4 Drill Through and Extract Fragments
Go slow and steady. Flood the area with coolant or lubricant like WD-40 to reduce heat and friction. If the flutes of the broken tap get in the way, carefully use a carbide end mill or ball nose cutter to remove those chunks. If your drill bit snaps, don’t panic—switch to smaller sizes progressively to get through the tap bit by bit.
Step 5 Clean and Restore the Hole
Once the tap fragments come free, clean the hole out thoroughly. Flush away all debris with compressed air or a solvent. Then chase the threads with the correct tap to restore damaged threads. For more extensive damage, you might want to install a Heli-Coil insert for durable thread repair. These inserts are easy to find at local auto parts stores or hardware suppliers and make the hole usable again quickly.
Following these steps will help you drill out broken taps safely and get your project back on track without hassle.
Advanced Drilling Techniques for Tough Breaks
Sometimes, drilling out a broken tap takes more than just a drill press and patience. For really tough breaks, especially in hardened steel taps, advanced techniques come into play.
cURL Too many subrequests.
cURL Too many subrequests.
cURL Too many subrequests.
cURL Too many subrequests.
cURL Too many subrequests.
cURL Too many subrequests.
cURL Too many subrequests.
cURL Too many subrequests.
cURL Too many subrequests.
- cURL Too many subrequests.cURL Too many subrequests.
- cURL Too many subrequests.cURL Too many subrequests.
- cURL Too many subrequests.cURL Too many subrequests.
- cURL Too many subrequests.cURL Too many subrequests.
- cURL Too many subrequests.cURL Too many subrequests.
Avoiding these mistakes will save time and protect your tools and parts when you drill out a broken tap.
Prevention Tips How to Avoid Broken Taps in the Future
Avoiding broken taps saves you time and money down the road. Here are some practical tips that work well in most U.S. home garages and small shops.
cURL Too many subrequests.
- Use Spiral Point Taps: These push chips forward, reducing clogging and stress on the tap.
- Follow Proper Speeds and Feeds: Check a reliable speeds and feeds chart for your material. Going too fast or too slow can cause snapping.
- Apply Quality Lubrication: Use cutting oils or specialized tap lubricants like Tap Magic for cleaner cuts and less heat buildup. Vast lubrication kits offer tailored fluids for different metals.
cURL Too many subrequests.
- Switch to Gun Taps: If you’re doing high volume threading, gun taps are faster and tougher, reducing the chance of breakage.
- Invest in Left-Hand Drill Bits: These help when removing broken taps by unscrewing them during drilling. A simple upgrade that pays off.
By sticking to these basic yet effective tips, you can keep your taps working longer and avoid frustrating breaks in your projects.