Learn how to tap holes like a pro with step-by-step guides, tool tips, and troubleshooting for metal wood and plastic projects using Vast tap kits.
Ever struggled with tapping holes only to end up with stripped threads or broken taps? You’re not alone. Whether you’re fixing something in your garage or tackling a DIY metal project, knowing how to properly create internal threads can save you time, money, and frustration. In this guide, we’ll cut right to the chase and show you exactly how to master tapping holes with precision, avoid common pitfalls, and get strong, reliable threads every single time. Ready to tighten up your skills? Let’s dive in!
Understanding the Fundamentals of Tapping Holes
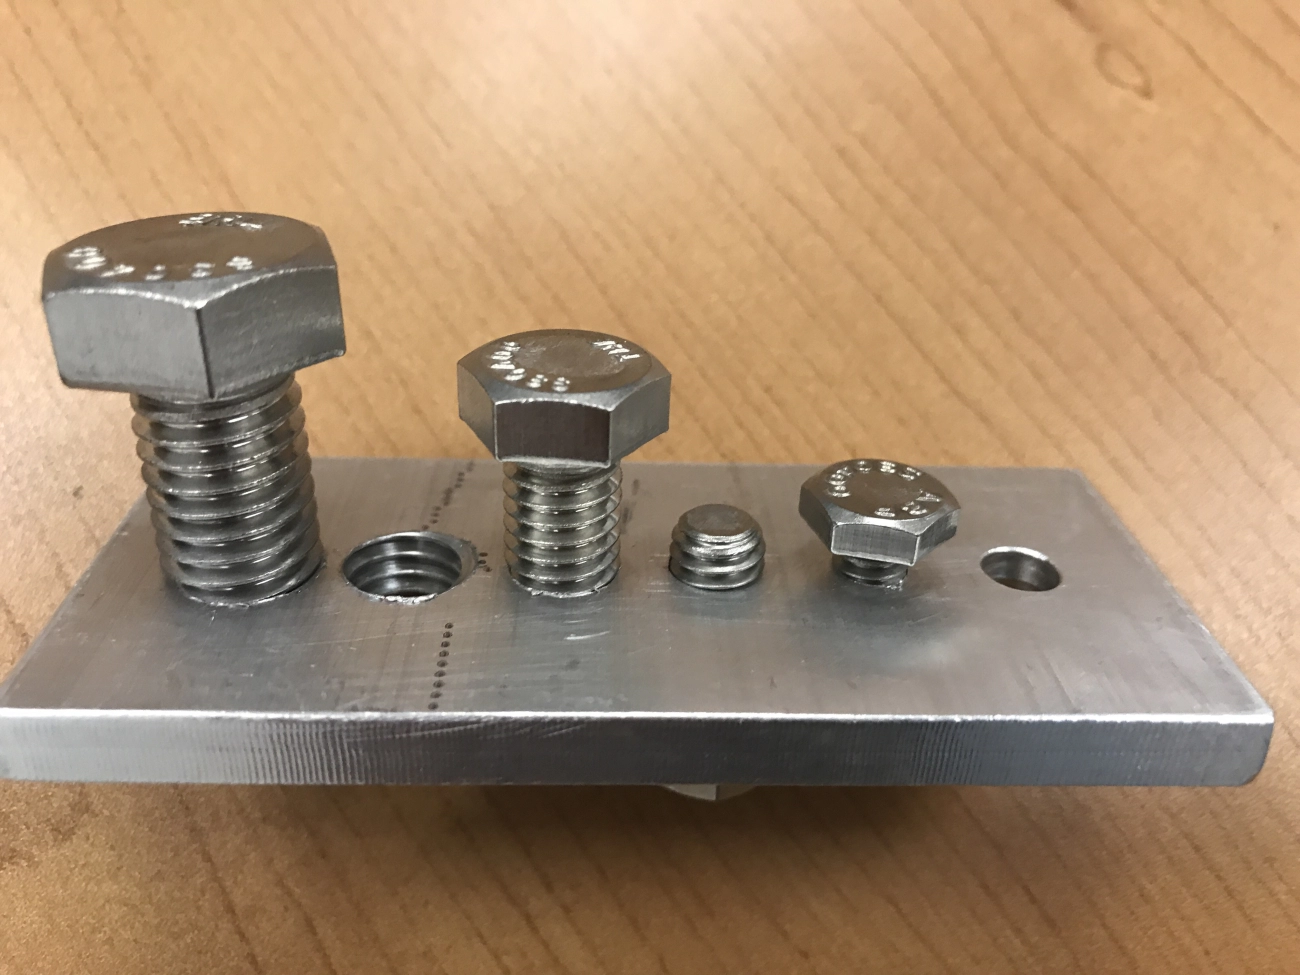
Tapping holes means cutting internal threads inside a drilled hole so screws or bolts can fasten tightly. The core process is straightforward:
- Drill a pilot hole sized for the tap
- Insert the tap tool into the hole
- Turn the tap clockwise to cut threads
- Manage chips by backing off occasionally to clear debris
Knowing some key terms helps:
- Chamfer is the angled edge at the start of the thread
- Pitch is the distance between threads
- Major diameter is the largest thread width
- Minor diameter is the smallest thread width inside the hole
- Blind holes stop before breaking through the surface, through holes go all the way through
Tapped holes are perfect for strong, removable assemblies found in automotive, woodworking, or metal fabrication projects. Contrary to the myth that tapping weakens the material, when done right, tapping actually strengthens holds by creating precise threads that grip securely. Proper technique and the right tools make all the difference.
Essential Tools and Materials for Successful Hole Tapping
To tap holes like a pro, having the right tools and materials is key. Here’s what you’ll need:
Must-Have Toolkit
- Tap and die set: This is your starter kit for creating internal threads. Make sure it includes various sizes for flexibility.
- T-handle or ratchet wrench: For better torque and control while turning the tap.
- Drill bits: The correct size is critical for smooth tapping.
Drill Size Selection
Choosing the right drill bit size matters for strong threads. Follow the 75 percent thread engagement rule — drill a hole that allows the tap to cut threads that engage at least 75% of the screw’s full thread height. This balances strength and ease of tapping.
To help with this, you can download and print a tap drill size chart featuring both metric and imperial sizes, making quick decisions easy.
Lubricants and Aids
Cutting oil or thread lubricant is a must-have. These reduce friction and heat, preventing tap binding and breaking. Different materials call for different lubricants:
- cURL Too many subrequests. cURL Too many subrequests.
- cURL Too many subrequests. cURL Too many subrequests.
- cURL Too many subrequests. cURL Too many subrequests.
cURL Too many subrequests.
cURL Too many subrequests.
- cURL Too many subrequests. cURL Too many subrequests.
- cURL Too many subrequests. cURL Too many subrequests.
cURL Too many subrequests.
cURL Too many subrequests.
cURL Too many subrequests. cURL Too many subrequests. cURL Too many subrequests.
cURL Too many subrequests.
cURL Too many subrequests.
Prep phase
First, mark the exact spot where you want to tap the hole. Use a center punch to create a small dent—this keeps your drill bit from wandering. Secure your workpiece firmly in a vise so it won’t move while drilling or tapping.
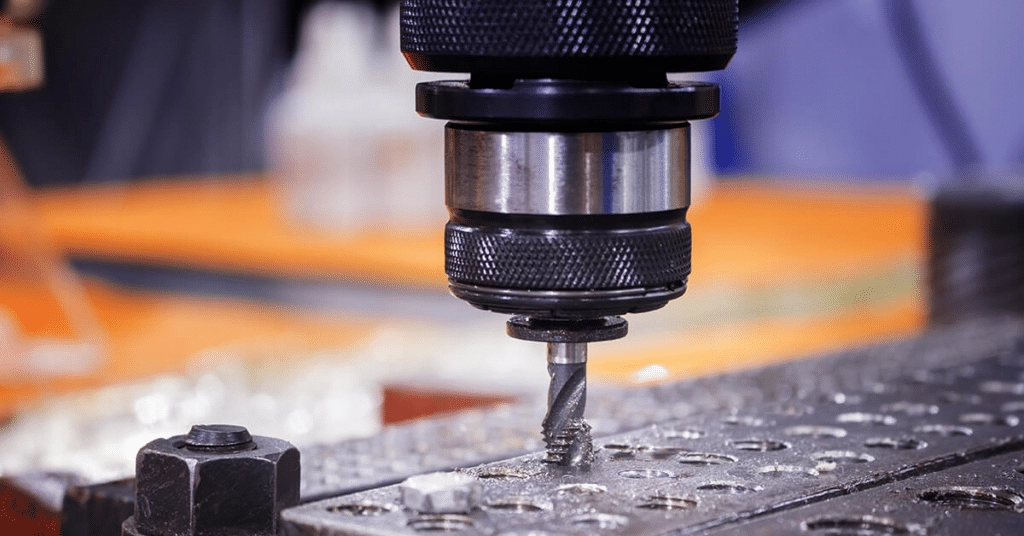
Drilling
Choose the correct drill bit size based on your tap drill size chart. When drilling, use a moderate speed to avoid overheating. Use the peck drilling method—drill a little, pull out to clear chips, then drill again. This helps prevent clogging and keeps the hole clean.
Tapping technique
Start tapping with a taper tap. It’s easier to get threads started because of its angled cutting edges. Once you’ve established the thread, switch to a bottoming tap for cutting threads deeper in the hole. Turn the tap clockwise half a turn, then back it off about a quarter turn to break chips and avoid binding. Keep this rhythm consistent through the process.
Finishing
After tapping, blow compressed air into the hole to clear leftover chips. Test the threads by screwing in a bolt—if it fits smoothly and holds tight, you’re done.
Adaptation for hand tapping
If you don’t have a drill press, no worries. Use a hand tap wrench and take your time to keep the tap straight. A simple trick is to start tapping by hand very slowly, ensuring the tap stays aligned before turning faster. Portable users can also use guides or clamps to keep things steady on the go.
Material Specific Tapping Strategies for Real World Projects
Different materials need different tapping approaches to get clean, strong threads without damaging the workpiece.
Metals like Steel and Aluminum
- Use higher torque to cut threads effectively, especially in harder metals like steel.
- Clear chips frequently to avoid clogging—this prevents tap breakage.
- For soft alloys like aluminum, spiral flute taps work best because they pull chips up and out, keeping the hole clean.
Wood
- Wood needs coarse threads for better grip.
- Pre-drill holes slightly larger than the tap to avoid splitting.
- Consider using wood inserts for stronger, longer-lasting threads, especially in soft or reclaimed wood.
Plastics and Composites
- Use low tapping speeds to prevent cracking or melting.
- Heat management is key—use lubricants designed for plastics to keep temperatures down during tapping.
Case Study: Tapping Cast Iron for Tool Restoration
- Cast iron is brittle, so tapping requires a slow, steady feed to avoid cracking.
- Use cutting oil generously for smoother cuts and longer tap life.
- Frequent chip clearing is important since chips can jam and cause tap breakage.
Quick Reference Table: RPM and Lubricant Recommendations by Material
| Material | Recommended RPM | Lubricant Type |
|---|---|---|
| Steel | 50 – 100 | Cutting oil / Tap fluid |
| cURL Too many subrequests. | 100 – 150 | Aluminum-specific oil |
| Wood | Varies (hand tapping) | Dry or light wax |
| Plastics | 20 – 50 | Light cutting oil or lubricant |
| Cast Iron | 30 – 50 | Heavy cutting oil |
Following these material-specific tips will save you time and help avoid common threading headaches in your tapping projects.
Troubleshooting Common Tapping Problems and Fixes
Tapping holes can come with a few headaches. Here’s how to fix the most common issues:
cURL Too many subrequests.
- cURL Too many subrequests. cURL Too many subrequests.
- cURL Too many subrequests. cURL Too many subrequests.
cURL Too many subrequests.
- cURL Too many subrequests. cURL Too many subrequests.
- cURL Too many subrequests. cURL Too many subrequests.
cURL Too many subrequests.
- cURL Too many subrequests. cURL Too many subrequests.
- cURL Too many subrequests. cURL Too many subrequests.
cURL Too many subrequests.
- cURL Too many subrequests. cURL Too many subrequests.
- cURL Too many subrequests. cURL Too many subrequests.
cURL Too many subrequests.
- If you’re working with deep, large holes or material that’s hard to tap by hand, it’s smarter to get professional help. Specialized equipment or CNC machines can save time and avoid costly mistakes.
Advanced Tips for Precision and Efficiency in Tapping Holes
When you’re ready to take tapping holes to the next level, here are some solid tips to boost precision and save time.
Scaling Up CNC Versus Hand Tapping
For small runs or one-off projects, hand tapping works fine. But for bigger jobs, CNC machines provide consistent accuracy and speed. If you stick with hand tapping, consider power tap adapters—they fit on drills or drivers and speed up tapping while keeping threads straight.
Retapping Damaged Holes
Got a stripped or damaged hole? Don’t panic. Use a step-by-step approach:
- Enlarge the hole slightly with a bigger drill bit.
- Use an oversized tap or thread repair insert (like Helicoil) to redo threads cleanly.
- This saves parts and keeps your project strong.
Quality Checks for Threads
Always check your tapped holes:
- Use thread gauges to verify correct sizing.
- Apply proper torque specs when tightening bolts—over or under-tightening can lead to failure.
- These checks ensure your assembly stays solid and safe.
Sustainability with Tap Maintenance
Extend your tap’s life by:
- Using sharpening kits to keep cutting edges sharp.
- Cleaning taps thoroughly after each job.
- Store them properly to avoid rust or damage.
Local Hack for Efficiency
If you’re working on seasonal DIY projects like garden tools, try batch tapping:
- Drill all your holes first, then tap each one in sequence.
- This rhythm saves time and reduces tool wear.
By using these tips, you’ll tap holes faster, cleaner, and with long-lasting results—right here in the U.S. where precision meets practicality.