Learn how anodizing works step-by-step the electrochemical process that creates durable corrosion-resistant oxide layers on aluminum and other metals。
What Is Anodizing?
Anodizing is a controlled electrochemical oxidation process that enhances the natural oxide layer on a metal’s surface. Unlike the thin, invisible oxide that forms naturally on aluminum or titanium, anodizing creates a thicker, engineered anodic coating designed to improve durability, corrosion resistance, and appearance.
While anodizing is most commonly associated with aluminum, it also applies to other metals like titanium, magnesium, zinc, and tantalum. This process transforms the metal’s surface into a robust, non-metallic layer that’s harder and more resistant to wear than the untreated metal beneath.
In simple terms, anodizing turns the metal surface into a protective oxide “shell,” making it last longer and look better, whether it’s on airplane parts, electronics, or architectural features.
The Science Behind Anodizing – How the Oxide Layer Forms
Aluminum naturally forms a very thin protective layer of aluminum oxide on its surface — called a passive layer — which is only about 3 to 5 nanometers thick. This layer helps protect the metal from corrosion but is super thin and delicate.
Anodizing takes this natural oxide layer and grows it much thicker, anywhere from 5 to over 75 micrometers (μm), depending on the process. This thicker anodic coating forms through an electrochemical oxidation process where aluminum acts as the anode in an electrolytic cell.
The oxide layer created during anodizing has two parts:
- Barrier layer: This is a thin, dense layer right next to the aluminum metal, which protects the base metal from corrosion.
- Porous layer: Above the barrier, this layer is made of tiny pores that allow for dyeing or sealing. Its pore structure is what makes anodizing versatile for coloring and finishing.
Together, these layers create a tough, corrosion-resistant surface far superior to aluminum’s natural passive film.
Step-by-Step: The Anodizing Process Explained
Here’s how the anodic oxidation process works from start to finish:
1. Cleaning & Surface Preparation
Before anodizing, the aluminum part needs a clean, smooth surface. This usually means:
- Alkaline etching to remove dirt and smooth out any surface roughness.
- Desmutting, which gets rid of residues and stains left after etching.
2. Racking
Next, the part is attached to a rack, typically made of titanium or aluminum. This rack acts as the electrical contact point during anodizing, so it needs to conduct electricity well without corroding.
3. Anodizing Tank Setup
The heart of the process is an electrolytic cell:
- The aluminum piece becomes the anode (positive electrode).
- A lead or stainless steel plate works as the cathode cURL Too many subrequests.
- cURL Too many subrequests. cURL Too many subrequests., cURL Too many subrequests.
cURL Too many subrequests.
cURL Too many subrequests.
- cURL Too many subrequests., cURL Too many subrequests.
- cURL Too many subrequests., cURL Too many subrequests.
cURL Too many subrequests.
cURL Too many subrequests.
cURL Too many subrequests. cURL Too many subrequests., cURL Too many subrequests.
cURL Too many subrequests.
cURL Too many subrequests.
cURL Too many subrequests.
cURL Too many subrequests.
8. Sealing
Finally, to lock in that color and lock out corrosion, the pores are sealed. Common sealing methods include:
- Hot water sealing, which hydrates and closes the pores naturally.
- Nickel acetate sealing, a chemical seal that adds extra corrosion resistance.
- Cold sealing, a lower-temperature process useful for color retention.
This step ensures the anodic coating stays tough, durable, and corrosion-resistant for years to come.
This clear sequence explains how anodizing voltage and current, electrolyte choice, and sealing methods all work together to form a durable, functional anodic coating on aluminum parts.
The Three Main Types of Aluminum Anodizing
When it comes to aluminum anodizing, there are three main types, each with its own purpose and characteristics:
- Type I & IB (Chromic Acid Anodizing): This type uses chromic acid and produces a very thin oxide layer, typically under 5 microns. It’s often used in aerospace applications because it adds corrosion protection without changing the aluminum’s dimensions much. Type IB is a slight variation with minor differences in the process but similar results.
- Type II (Sulfuric Acid Anodizing): The most common and standard method, this uses sulfuric acid to create a thicker, decorative, and functional coating typically around 10 to 25 microns. It meets military spec Mil-A-8625 requirements and works well for architectural and consumer products needing corrosion resistance and good appearance.
- Type III (Hardcoat Anodizing): This produces a much thicker coating, anywhere from 25 to 150 microns, making it ideal for heavy-duty wear resistance. The hardcoat has a dense, hard surface but doesn’t absorb color well, so it’s mostly used where durability matters more than aesthetics.
Each type balances thickness, durability, and appearance, so choosing the right anodizing depends on what you need the aluminum part to do.
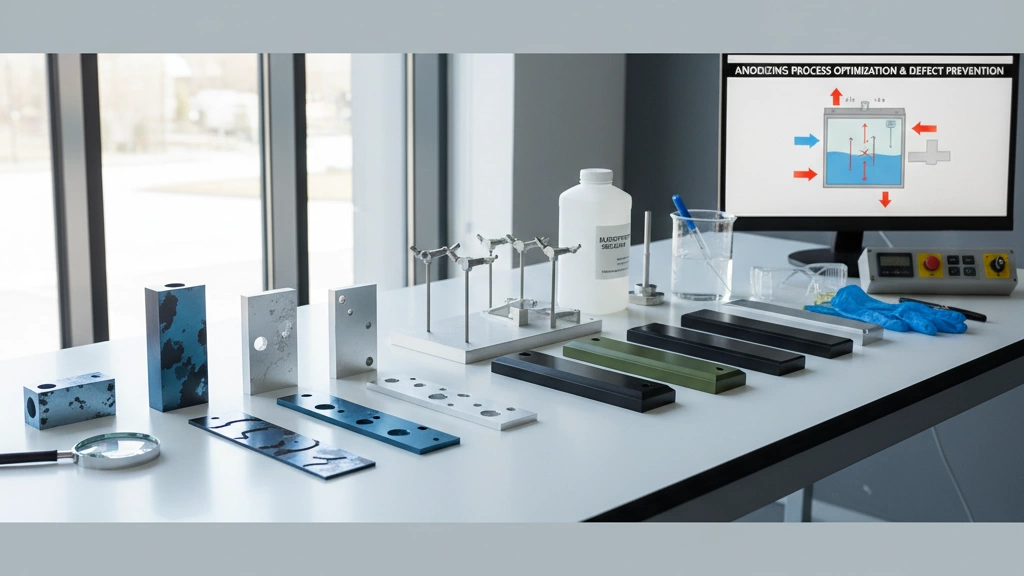
Key Process Parameters That Control the Result
Several factors shape how anodizing turns out, especially when working with aluminum. Here’s what really matters:
Temperature
- Type II (Sulfuric Acid Anodizing): Keep it around 18–22°C (64–72°F).
- Type III (Hardcoat Anodizing): Much cooler, around 0–5°C (32–41°F).
Temperature affects the oxide layer’s growth rate and quality—too hot or cold can create problems like burning or poor hardness.
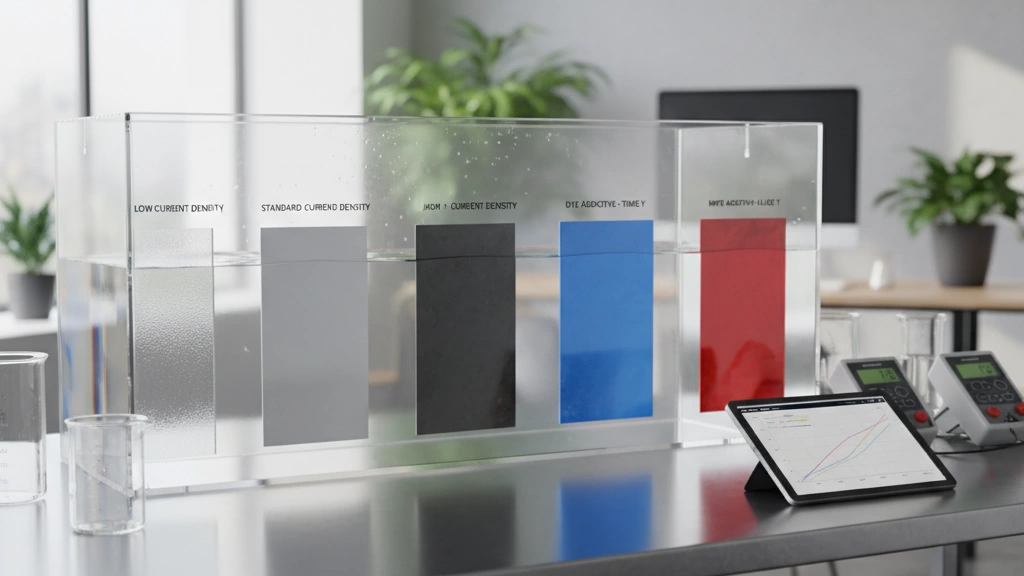
Current Density
Measured in amps per square decimeter (A/dm²), current density controls how fast the oxide layer forms. Typical ranges are:
- Type II: 1.0–1.5 A/dm²
- Type III: 1.5–3.0 A/dm²
Higher current usually means thicker oxide, but too much can cause defects.
Time vs Thickness (The 720 Rule)
A handy rule for sulfuric acid anodizing:
- Thickness (μm) ≈ (Anodizing Time in minutes) ÷ 12
- Or put simply, it takes about cURL Too many subrequests. cURL Too many subrequests.
cURL Too many subrequests.
cURL Too many subrequests.
cURL Too many subrequests.
| cURL Too many subrequests. | cURL Too many subrequests. | cURL Too many subrequests. |
|---|---|---|
| cURL Too many subrequests. | cURL Too many subrequests. | cURL Too many subrequests. |
| 6061 | Good | cURL Too many subrequests. |
| 7075 | cURL Too many subrequests. | cURL Too many subrequests. |
| cURL Too many subrequests. | cURL Too many subrequests. | cURL Too many subrequests. |
cURL Too many subrequests.
cURL Too many subrequests.
| Parameter | cURL Too many subrequests. | Type III (Hardcoat) | cURL Too many subrequests. |
|---|---|---|---|
| Temperature | 18–22°C (64–72°F) | 0–5°C (32–41°F) | Controls oxide growth quality |
| Current Density | 1.0–1.5 A/dm² | 1.5–3.0 A/dm² | Higher = faster growth |
| Time per 1 μm | ~12 minutes | Varies, generally longer | Thickness depends on time |
| Alloy Effects | Smooth (pure), varies | Sensitive alloys prone to defects | Know your metal for best result |
Controlling these key parameters ensures you get consistent, durable anodic coatings suited for your application.
Why Anodizing Is So Durable – Corrosion & Wear Resistance
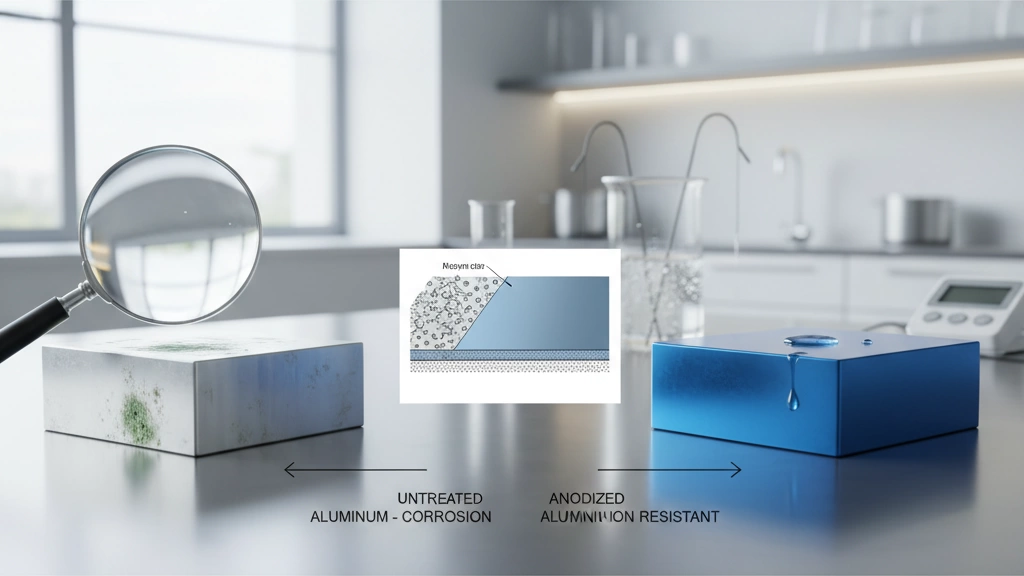
Anodizing makes aluminum tough because it creates a dense, protective oxide layer. The surface forms a hexagonal pore structure, which might seem fragile at first, but once sealed, it locks out moisture and contaminants that cause corrosion. This sealed barrier makes anodized aluminum much more resistant to rust and wear than bare metal.
In salt spray tests, anodized aluminum outperforms both bare and painted aluminum, showing far less corrosion over time. This is why anodizing is popular for outdoor and marine applications where durability is key.
For wear resistance, Type III hardcoat anodizing is especially strong. It can reach hardness levels of 60–70 Rockwell C, which is similar to hardened steel, making it ideal for parts that face friction and mechanical stress.
Key durability points:
- Hexagonal pore structure: Provides a foundation for strong oxide growth.
- Sealing process: Closes pores to block corrosion agents.
- Salt spray resistance: Superior to bare and painted aluminum.
- High hardness: Type III anodizing hits 60–70 Rockwell C for wear resistance.
This combination explains why anodizing is one of the most durable surface treatments available for aluminum and other metals.
Coloring Anodized Parts – Integral, Dye, and 2-Step Processes
When it comes to coloring anodized aluminum, there are three main ways to get the desired look:
- Integral Coloring: The color forms naturally during anodizing by adding certain metals like nickel or cobalt to the electrolyte. This creates a durable, built-in color right in the oxide layer. It’s tough and great for functional parts needing a uniform finish.
- Dye Coloring: After anodizing, the porous oxide layer acts like a sponge, soaking up organic dyes, which come in lots of bright colors. Inorganic dyes, like ferric ammonium oxalate, provide earthier tones and better fade resistance. Dyeing is popular for decorative uses since it offers huge color variety.
- Electrolytic (2-Step) Coloring: This method deposits metal salts, such as tin or cobalt, into the pores using electricity after the dye step. It adds a thin metallic layer that locks in color and provides greater hardness and wear resistance. This is common for black or dark finishes that need extra durability.
Why Black Is the Toughest Color to Get Right
Black anodizing is by far the hardest color to achieve uniformly because:
- The darker dyes tend to absorb unevenly in the pores.
- Black dye can fade quicker if not sealed properly.
- The metal deposits in 2-step processes must be carefully controlled; any variation leads to patchy or dull areas.
In the U.S. market, for applications requiring consistent black finishes—like automotive parts or outdoor gear—many professionals prefer 2-step electrolytic coloring combined with high-quality sealing to meet durability and aesthetic standards.
Understanding these coloring options helps you choose the best approach based on your anodized part’s use and look.
cURL Too many subrequests.
cURL Too many subrequests.
- cURL Too many subrequests. cURL Too many subrequests.
- cURL Too many subrequests. cURL Too many subrequests.
- cURL Too many subrequests. cURL Too many subrequests.
- cURL Too many subrequests. cURL Too many subrequests.
cURL Too many subrequests.
cURL Too many subrequests.
cURL Too many subrequests.
| cURL Too many subrequests. | cURL Too many subrequests. | cURL Too many subrequests. | cURL Too many subrequests. | Typical Use Cases |
|---|---|---|---|---|
| Aluminum | cURL Too many subrequests. | cURL Too many subrequests. | Corrosion & wear resistance, dyeable | Aerospace, automotive, decorative |
| Titanium | Sulfuric Acid, Organic Electrolytes | 1–10 μm | Colorful oxide layers, biocompatible | Medical implants, jewelry, aerospace |
| Magnesium | Fluoride or Sulfuric-based | 1–5 μm | Lightweight corrosion protection | Electronics, automotive parts |
| Zinc | Sulfuric Acid or Phosphoric | 2–10 μm | Corrosion resistance, decorative | Die cast parts, fasteners |
| Tantalum | Sulfuric Acid or Phosphoric | 2–20 μm | High chemical resistance | Electronics, chemical processing |
Key Points to Know:
- Titanium anodizing creates colorful, durable oxide films often used for aesthetic and medical purposes.
- Magnesium anodizing helps fight corrosion but produces thinner coatings compared to aluminum.
- Zinc and tantalum anodizing focus more on corrosion protection and are usually found in specific industrial uses.
If you’re thinking about anodizing metals other than aluminum, it’s important to match the electrolyte and process to the metal type. This ensures durability and the right finish for your project.
DIY Anodizing vs Professional – Is It Worth It in 2025?
If you’re wondering whether to anodize aluminum yourself or go pro in 2025, here’s the lowdown:
Cost Breakdown
- DIY kits can run $100–$300, including acids, power supplies, and dyes.
- Professional anodizing typically costs $1–$5 per part, depending on size and finish.
- Setup and materials add up fast if you scale beyond small hobby projects.
Safety First
- Anodizing uses strong acids (usually sulfuric acid) and high electrical currents.
- Handling chemicals without proper gear can cause burns or toxic exposure.
- Professionals follow strict safety protocols and dispose of chemicals responsibly.
When to Outsource
- Outsource if you want cURL Too many subrequests., cURL Too many subrequests.
- cURL Too many subrequests.
- cURL Too many subrequests. cURL Too many subrequests. cURL Too many subrequests.
cURL Too many subrequests.
cURL Too many subrequests.
cURL Too many subrequests.
cURL Too many subrequests.
cURL Too many subrequests.
cURL Too many subrequests.
cURL Too many subrequests.
cURL Too many subrequests.
cURL Too many subrequests.
| Feature | cURL Too many subrequests. | cURL Too many subrequests. |
|---|---|---|
| cURL Too many subrequests. | cURL Too many subrequests. | Typically 0.4 to 0.7 mils |
| cURL Too many subrequests. | High, meets military standards | Moderate, decorative focus |
| Corrosion Resistance | Excellent | Good |
| Color Options | Limited (often clear or black) | Wide range |
| Application | Aerospace, defense | Buildings, consumer goods |
Understanding these FAQs helps you know what to expect with anodizing and pick the right type for your project.