Learn how to ream a hole with precision using the right tools and techniques for smooth finishes and accurate hole sizing every time.
What Is Reaming? Understanding the Fundamentals
Reaming is a machining process that improves the size, finish, and accuracy of an existing hole. Unlike drilling, which creates the initial hole, reaming fine-tunes it to achieve a precise diameter and smooth surface. The goal? A consistent, tight tolerance hole that’s ready for assembly or further machining.
Key Principles of Reaming
- Precision finishing: Reamers remove a small amount of material (usually 0.001 to 0.005 inches) to sharpen hole dimensions.
- Smooth surface: Reaming delivers a cleaner, more polished bore compared to drilling.
- Hole size control: It’s the go-to for achieving consistent hole tolerances necessary for bearings, bushings, or precision fasteners.
When to Ream: Precision Fits and Applications
You’ll ream a hole whenever you need exact fits—think dowel pins, shafts, or hydraulic components. It’s essential in:
- Precision engineering
- Automotive and aerospace parts
- Tool and die making
- Hydraulic cylinder assembly
Historical Context and Machining Relevance
Reaming has been a staple in metalworking since the Industrial Revolution. As manufacturing precision improved, reaming evolved from manual hand tools to CNC-controlled processes. Today, it bridges the gap between rough drilling and expensive finishing like grinding, making it indispensable in modern shops.
In short, reaming ensures holes meet tight tolerances and smooth finishes efficiently—a fundamental skill and process in both DIY and professional machining.
Essential Tools and Materials for Reaming a Hole
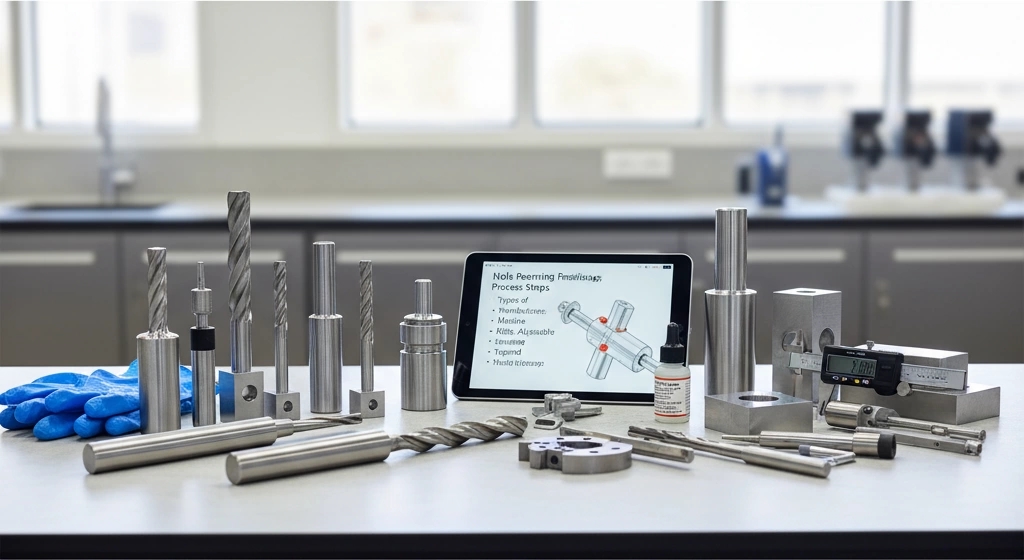
When it comes to reaming a hole, having the right tools and materials is key to getting a precise finish and staying efficient. Here’s a quick rundown of what you’ll need:
Types of Reamers and Their Uses
- Hand reamers: Great for small jobs or touch-ups. They give you control but need steady hands.
- Machine reamers: Used with drills or CNC machines, perfect for consistent, repeatable precision.
- Tapered reamers: Ideal when you need a slightly angled hole or to fix misaligned pilot holes.
- Shell reamers: These handle larger diameters and often come with replaceable cutters.
Supporting Tools and Measurement Instruments
- Drill bits for pre-drilling pilot holes—always choose one a bit smaller than your final hole size.
- Calipers and micrometers to check hole diameter and ensure you meet tight tolerances.
- Surface gauges or dial indicators for aligning your workpiece and reamer.
- Deburring tools to clean up edges before and after reaming.
Material-Specific Tool Choices and Safety Gear
- Harder materials like stainless steel need carbide or cobalt reamers.
- cURL Too many subrequests.
- cURL Too many subrequests. cURL Too many subrequests. cURL Too many subrequests. cURL Too many subrequests. cURL Too many subrequests.
- cURL Too many subrequests.
cURL Too many subrequests.
| Material | cURL Too many subrequests. | cURL Too many subrequests. | cURL Too many subrequests. |
|---|---|---|---|
| Aluminum | cURL Too many subrequests. | cURL Too many subrequests. | cURL Too many subrequests. |
| Stainless Steel | cURL Too many subrequests. | cURL Too many subrequests. | cURL Too many subrequests. |
| Cast Iron | cURL Too many subrequests. | cURL Too many subrequests. | cURL Too many subrequests. |
| Plastic | HSS with coatings | Soft material handling | cURL Too many subrequests. |
Using the right combo of tools, measuring gear, and protective equipment will help you ream a hole clean, accurate, and safe every time.
Preparing Your Workpiece: Setting Up for Success
Before you ream a hole, proper prep is key to getting a clean, precise finish. Start with pre-drilling the hole using the right drill size—usually a bit smaller than your final reamed size. This ensures the reamer can do its job smoothly without excessive wear. Don’t forget spot facing if your workpiece has uneven surfaces; it creates a flat area around the hole entrance, helping the reamer enter straight.
Next, make sure your workpiece is securely clamped and perfectly aligned. Even a slight shift can throw off hole tolerance and surface finish. Use a vise or fixture to keep the piece steady, and double-check alignment with measuring tools.
When planning your cut, leave a stock allowance of about 0.002 to 0.005 inches for the reamer to remove. This small margin helps prevent tool overload and ensures a smooth finish. Also, factor in environmental conditions like temperature and humidity, which can affect material expansion or contraction, especially with metals.
For those using CNC machines, here are a few quick tips:
- Program the toolpath to maintain consistent speed and feed rates
- Use coolant to reduce heat and extend tool life
- Confirm that your machine’s spindle is properly aligned
- Perform test runs on scrap material to dial in settings before the actual workpiece
Setting up your workpiece right sets the stage for precise, clean holes every time.
Step-by-Step Guide: How to Ream a Hole Like a Pro
Reaming a hole right takes some care and attention. Here’s a straightforward way to get it done like a pro every time.
Measurement and Marking
Start by measuring your workpiece carefully. Use a caliper or micrometer to mark exactly where the hole needs to be. Precision here saves you headaches later.
Pilot Hole Drilling Tips
Drill a pilot hole slightly smaller than your reamer size. Make sure the hole is straight and clean—this guides the reamer smoothly and prevents wobbling.
Reaming Speed and Feed Recommendations
Run your reamer at the speed and feed rate suggested for your material. For most metals, a slower speed with steady pressure works best. Too fast, and you’ll risk tool wear or rough finishes.
Advancement Technique and Inspection
Push the reamer in steadily without forcing it. Keep the tool aligned with the hole to avoid tapering. After reaming, inspect the hole with a gauge or caliper for tight tolerance and smooth surface finish.
Hand vs. Machine Reaming
Hand reaming gives you more control on small jobs or tricky spots—just be patient and steady. Machine reaming is faster and more consistent, especially for multiple holes or tougher materials.
Demo/Video Reference
If you’re new to reaming, watching a demo video can be a great help. There are plenty online that show exactly how to hold the reamer, set speeds, and check your hole finish—making learning quick and practical.
Common Mistakes and Troubleshooting: Avoiding Reaming Pitfalls
Reaming a hole sounds simple, but it’s easy to run into problems if you’re not careful. Here are some common issues and how to fix them:
Oversized Holes: Causes and Fixes
- cURL Too many subrequests. cURL Too many subrequests.
- cURL Too many subrequests. cURL Too many subrequests.
cURL Too many subrequests.
- cURL Too many subrequests. cURL Too many subrequests.
- cURL Too many subrequests. cURL Too many subrequests.
cURL Too many subrequests.
- cURL Too many subrequests. cURL Too many subrequests.
- cURL Too many subrequests. cURL Too many subrequests.
cURL Too many subrequests.
- cURL Too many subrequests.
- cURL Too many subrequests.
- cURL Too many subrequests.
cURL Too many subrequests.
| Problem | Cause | Solution |
|---|---|---|
| cURL Too many subrequests. | cURL Too many subrequests. | cURL Too many subrequests. |
| cURL Too many subrequests. | Incomplete pass | Re-ream fully, adjust speed |
| Chatter / marks | Vibration | Tighten setup, adjust feed |
| Tool breaks | Misalignment/force | Align tool, slow feed |
Real-World Troubleshooting Example
I once had a job where the holes ended up slightly too large. After reviewing, I found the reamer was worn down and running too fast. Replacing the tool and slowing the feed solved the problem immediately. Remember, a little maintenance and patience goes a long way in precision hole finishing.
By knowing these pitfalls and fixes, you’ll save time and keep your projects on track.
Advanced Techniques: Elevating Your Reaming Skills
If you want to take your hole reaming beyond the basics, these advanced techniques are a game changer.
- Multi-Step Reaming for Deep Holes: Reaming very deep holes in one pass can cause tool wear and accuracy issues. Instead, use multi-step reaming—ream partway, then back out to clear chips, and repeat until the full depth is finished. This improves surface finish and keeps your reamer from binding.
- CNC Toolpath Programming and Adaptive Clearing: When working with CNC machines, programming your toolpath for adaptive clearing helps maintain consistent feed rates and reduces vibration. This keeps precision hole finishing on point, even at high speeds.
- Specialized Tapered and Helical Reaming: Some jobs require tapered holes or helical reamers to match specific fits. These specialized reamers provide customized hole shapes with tight tolerances, especially useful in aerospace or automotive applications.
- Material-Specific Feed and Coolant Strategies: Different materials need different feed rates and coolants to prevent tool wear and overheating. For example, aluminum might require higher speeds with minimal coolant, while stainless steel benefits from slower feeds and plenty of lubrication to avoid chatter and scoring.
- Batch and Modular Tooling Integration: For high-volume or complex jobs, integrating modular tooling systems helps speed up setups and tool changes. This reduces downtime and keeps your production line efficient without sacrificing precision.
Using these techniques can seriously upgrade your reaming game, delivering better accuracy and longer tool life for demanding projects.
Benefits of Precision Reaming and When to Call in the Pros
Advantages of Tight Tolerances and Cost Savings
Reaming a hole lets you achieve tight tolerances and smooth finishes that simple drilling can’t match. This improved precision means parts fit better, last longer, and require less rework—saving both time and money in the long run. Plus, reaming is faster and cheaper than grinding for many hole-finishing tasks.
Limitations of Reaming and Alternative Approaches
Reaming isn’t perfect for every job. It struggles with extremely hard materials or holes needing ultra-precise dimensions beyond typical tolerance ranges. In these cases, alternatives like cylindrical grinding, honing, or boring may be necessary.
| cURL Too many subrequests. | Best For | Tolerance Range | Cost |
|---|---|---|---|
| Reaming | Precision fits, smooth holes | ±0.001 in. to ±0.0005 in. | cURL Too many subrequests. |
| Grinding | Ultra-precision finishes | ±0.0001 in. or better | cURL Too many subrequests. |
| cURL Too many subrequests. | cURL Too many subrequests. | cURL Too many subrequests. | cURL Too many subrequests. |
cURL Too many subrequests.
cURL Too many subrequests.
cURL Too many subrequests.
cURL Too many subrequests.
cURL Too many subrequests. cURL Too many subrequests.