Discover precise O-ring groove dimensions with AS568 charts and expert tips for leak-proof seals in hydraulic and mechanical applications.
If you’ve ever faced unexpected leaks or premature wear in your sealing systems, the culprit often boils down to one thing: incorrect O-ring groove dimensions. Getting these dimensions right isn’t just a detail—it’s the foundation for reliable, long-lasting seals that keep hydraulic pistons, automotive parts, and industrial equipment running smoothly. In this post, you’ll discover exactly how to size and design O-ring grooves with precision, based on industry standards like AS568, so you can avoid costly downtime and maximize seal performance. Ready to master the key to leak-free sealing? Let’s dive in.
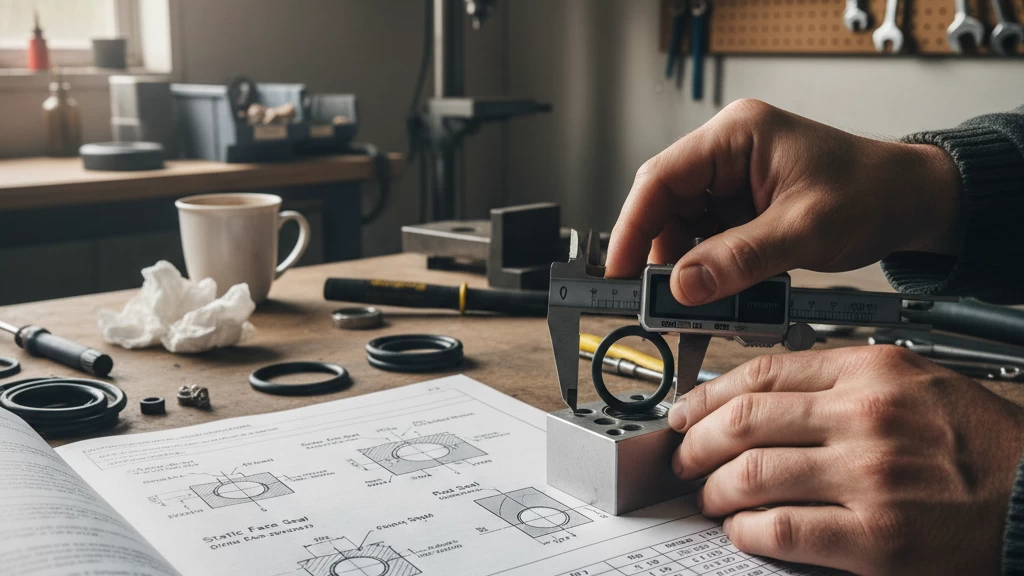
Fundamentals of O-Ring Groove Design
Designing an effective O-ring groove is all about balance. You need the right combination of seal squeeze, stretch, and volume fill to ensure a leak-free seal without damaging the O-ring. Too much squeeze can cause premature wear, while too little may let fluid escape. Stretch must be controlled to avoid overstressing the material.
Material and environmental factors also play a big role. Temperature swings, chemical exposure, and pressure levels can affect how the O-ring performs. For example, some materials expand under heat, requiring slightly larger groove dimensions.
Pressure thresholds matter too—high-pressure systems demand tighter clearances and careful groove design to prevent extrusion or failure.
Watch out for common pitfalls like oversizing the groove or ignoring surface finish requirements. Small mistakes here often lead to leaks or short seal life.
In a nutshell:
- Maintain proper compression squeeze (typically 20-30%)
- Avoid excessive stretch (generally under 5%)
- Account for material properties & environmental conditions
- Design grooves to handle anticipated pressure loads
- Prevent common issues with precise dimensioning and finish
Getting these basics right sets the stage for a reliable, long-lasting seal.
Standard O-Ring Groove Dimensions
When it comes to standard O-ring groove dimensions, the AS568 chart is the go-to reference in the U.S. This imperial standard covers groove width, depth, chamfers, and tolerances for various O-ring sizes. The groove must be sized right to ensure proper O-ring compression squeeze and prevent leaks or damage. Key details include:
- Groove Depth: Typically slightly less than the O-ring cross-section for the right squeeze.
- Groove Width: Wide enough to allow easy installation but tight enough to prevent extrusion.
- Chamfers: Small reliefs in the groove edges to prevent O-ring nicking during assembly.
- Tolerances: Tight tolerances ensure consistent sealing performance, usually ±0.001 to ±0.005 inches depending on the size.
For those working with metric sizes, BS1806 and ISO 3601 standards provide equivalent groove dimensions. These metric charts align with similar principles but use metric units. It’s important to note:
- Metric grooves follow slightly different depth and width values but maintain the same functional goals.
- Metric O-ring specifications often include additional sizing variants for European and Asian markets.
Some applications call for tweaks beyond these standards—like deeper grooves for backup ring integration or wider grooves for specialty seals used in high-pressure hydraulic piston grooves. Always check your specific use case and refer to updated charts for the best fit.
Groove Types and Dimensions
When it comes to o-ring groove dimensions, understanding the type of seal you need is key. Here’s a quick rundown of the main groove types and what to expect dimension-wise:
Static Radial Seals (Piston/Rod)
- Used in hydraulic cylinders and rods.
- Groove width and depth are designed to control seal squeeze—usually around 15-30% compression.
- The groove must account for o-ring stretch when installed to avoid over-stressing the material.
- Chamfers are necessary on groove edges to prevent cutting the o-ring during assembly.
- Standard dimensions often follow AS568 groove charts for imperial sizes or BS1806/ISO 3601 for metric parts.
Dynamic Reciprocating Seals
- Found in piston and rod sealing under motion.
- Groove depth is shallower compared to static seals to reduce friction and extrusion.
- Clearance is critical here to allow smooth movement without o-ring damage.
- Backup rings may be used in grooves with higher pressure to prevent extrusion, especially in dynamic settings.
- Groove width must balance compression squeeze with space for lubrication.
Face/Flange Seals
- These are axial seals where the o-ring is compressed between two flat surfaces.
- Groove dimensions are often deeper and wider to support high squeeze necessary for sealing static pressure.
- Groove design may include chamfers or fillets for alignment.
- Often paired with flange designs tailored to the groove dimensions to ensure proper sealing at various pressure levels.
Specialty Groove Designs
- Dovetail and half-dovetail grooves hold the o-ring in place axially, minimizing movement during dynamic applications.
- Deep grooves can accommodate larger o-rings or dual-seal setups.
- These designs often require custom calculation for stretch and squeeze—critical for balancing wear and maintaining seal integrity.
Stretch and Squeeze Calculation Formulas
- Squeeze (%) = [(Cross-section – Groove depth) / Cross-section] × 100
- Stretch (%) = [(Inside diameter of groove – O-ring ID) / O-ring ID] × 100
Proper calculation helps avoid over-compression that leads to seal failure or under-compression that causes leaks.
In , matching groove type and dimensions to your application ensures the best seal life and performance — whether you’re sealing a hydraulic piston, a rotating shaft, or a flange connection.
Advanced Design Factors for O-Ring Groove Dimensions

When designing O-ring grooves, getting the clearance and extrusion control right is crucial for a reliable seal. Too much clearance can lead to O-ring extrusion under pressure, while too little can cause excessive squeeze and premature wear. Use extrusion control charts to select groove dimensions that balance these factors based on operating pressure and material hardness.
Surface finish also plays a big role. Aim for a smooth finish—usually around 16 microinches (Ra) or better—to prevent cutting or tearing of the O-ring during installation and use. Rough grooves increase the risk of leaks and damage over time.
Installation tolerances must be precise; even small deviations can affect seal performance. Always follow recommended dimensional tolerances for groove width and depth as per AS568 or ISO standards.
Lubrication helps reduce friction during assembly, preventing the O-ring from rolling or twisting inside the groove, which can shorten its life. Use compatible lubricants that won’t degrade the O-ring material.
If you’re running complex designs, Finite Element Analysis (FEA) can be a valuable tool. FEA lets you simulate how the O-ring will behave under pressure and temperature, helping you optimize groove dimensions before production.
A real-world example: An optimized groove design changed the depth and added a small chamfer, reducing extrusion and extending seal life by over 30%. This kind of fine-tuning is especially important in high-pressure hydraulic piston grooves and dynamic sealing applications.
In short, advanced groove design isn’t just about meeting standards—it’s about fine adjustments that improve reliability, reduce maintenance, and lower costs over the long haul.
Tools and Resources for O-Ring Groove Calculations
When designing or selecting O-ring groove dimensions, having the right tools makes all the difference. Here’s what I recommend to simplify your groove calculations and ensure accurate fits:
- Step-by-step calculators: Online tools that walk you through groove depth, width, and squeeze percentage calculations based on your O-ring size. These help avoid common mistakes and speed up design time.
- Software integrations: Many CAD programs offer plugins or add-ons tailored for O-ring groove design. These let you model groove dimensions directly with AS568 or metric standards built-in, so you see real-time fits and tolerances.
- Seal sourcing and sizing quizzes: Platforms like Vast have helpful quizzes that guide you through picking the right O-ring dimensions based on your specific application, pressure, and environmental conditions. This takes the guesswork out of sizing.
- Downloadable charts and guides: Keep updated AS568 groove charts, BS1806/ISO 3601 tables, and installation guides handy. These provide exact gland dimensions, recommended tolerances, and critical design notes in one place.
Using these tools together makes it easier to hit the right O-ring groove dimensions, avoid rework, and get durable seals for your projects. It’s all about making sure your groove suits the seal perfectly, every time.
Common Mistakes and Troubleshooting
When it comes to O-ring groove dimensions, small errors can cause big problems. Here are some top design mistakes to watch out for:
- Incorrect groove depth: Too shallow, and the O-ring won’t seal right; too deep, and you lose necessary squeeze.
- Wrong groove width: If the groove is too wide, the O-ring can twist or extrude under pressure. Too narrow, and installation gets difficult or damages the seal.
- Ignoring material stretch and compression: Overstretching or under-compressing the O-ring reduces its life and sealing ability.
- Skipping chamfers or missing installation clearance: This makes assembly tough and often leads to cuts or nicks on the seal.
Diagnostic Visual Checks
Regularly inspect O-rings for signs like:
- Flattened or cut edges
- Surface cracks or extrusion marks
- Uneven wear or swirl marks on dynamic seals
Pressure Testing Tips
Run pressure tests within the seal’s working range, paying attention to squeeze and extrusion flags. If leaks occur, revisit groove dimensions and adjust seal size or backing rings if used.
Maintenance Recommendations
- Replace O-rings periodically depending on operating environment
- Use proper lubrication for installation
- Avoid reused or damaged seals — always check groove surface finish and cleanliness before assembly
FAQ on Groove Depths and Standards
- Q: Can I use AS568 groove dimensions for metric O-rings?
A: It’s best to follow ISO 3601 or BS1806 for metric seals since dimensions vary. - Q: How much squeeze is ideal?
A: Generally, 20-30% compression works for static seals; dynamic seals often need less to reduce friction. - Q: What if my application has high pressure?
A: Consider tighter groove tolerances, backup rings, or specialized groove profiles to prevent extrusion.
Avoiding these common pitfalls saves time and prevents failures down the road, keeping your O-ring seals reliable and long-lasting.