Master injection molding of PMMA with optimal temperatures drying tips and defect fixes for crystal-clear acrylic parts and precision prototypes.
If you’re working with injection molding PMMA, you already know that producing crystal-clear, durable acrylic parts isn’t as simple as it looks. The key to flawless PMMA injection molding lies in mastering the right processing parameters, understanding material behavior, and avoiding costly defects.
In this guide, you’ll get straightforward, expert advice on everything from ideal drying times and temperatures to pressure settings, mold design tips, and troubleshooting common issues like bubbles and stress cracks. Whether you’re an engineer, product designer, or manufacturer aiming to optimize your acrylic parts production, keep reading—because nailing PMMA molding can transform your projects from average to exceptional.
What is PMMA Properties Making It Ideal for Injection Molding
Polymethyl Methacrylate (PMMA) is a versatile amorphous thermoplastic widely known as acrylic or Plexiglass. Its unique chemical structure gives it outstanding clarity and excellent durability, making it a top choice for injection molding.
Key Properties of PMMA
| Property | Value | Benefit |
|---|---|---|
| Density | 1.18 g/cm³ | Lightweight for easy handling and use |
| Light Transmission | 92% | Superior optical clarity for lenses & displays |
| Shrinkage | 0.2% – 0.5% | Minimal distortion, precise molding |
| UV Resistance | Excellent | Long-lasting outdoor and automotive parts |
| Melt Temperature | 220°C – 260°C | Suitable for efficient injection molding |
PMMA Grades for Various Applications
- High Flow PMMA: Ideal for intricate, thin-wall parts.
- Optical Grade: Perfect for lenses and clear displays.
- Impact Modified: Enhanced toughness for durable parts.
- Standard Durables: Balanced properties for everyday use.
PMMA vs Competitors
| Material | Clarity | Cost | Use Case |
|---|---|---|---|
| PMMA | Superior (92%) | Lower | Clear optics, automotive |
| Polycarbonate (PC) | Good (88%) | Higher | Impact-resistant parts |
| ABS | Moderate (85%) | Comparable | Structural components |
PMMA stands out due to its superior clarity combined with lower cost compared to polycarbonate and ABS. This balance makes it ideal for industries seeking high-quality clear parts without breaking the budget.
Step by Step PMMA Injection Molding Process
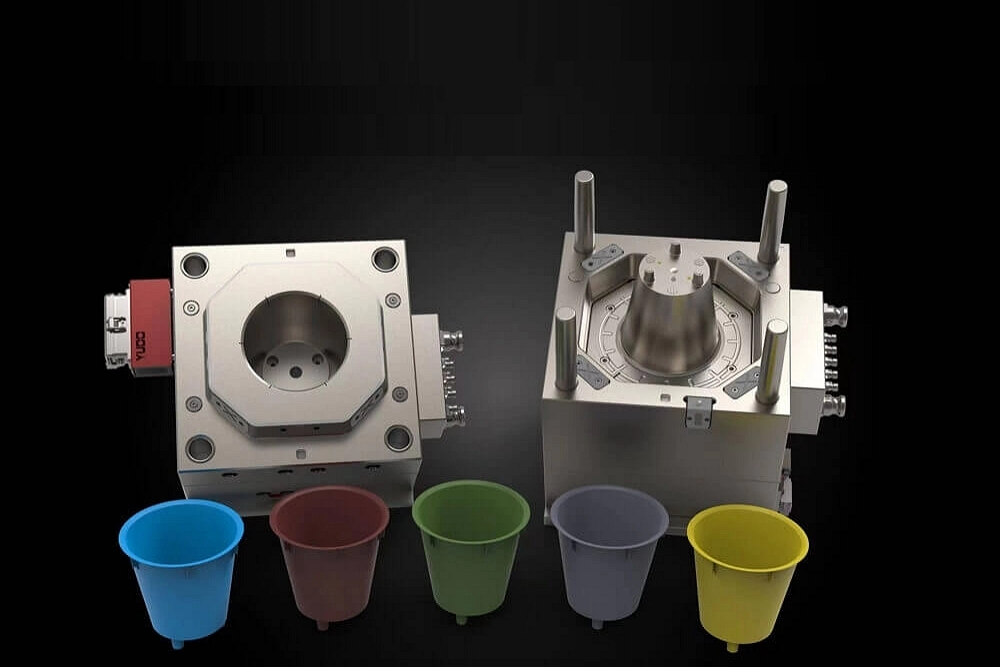
Getting the best results with PMMA injection molding starts with following the right process steps closely. Here’s a straightforward guide to what you should expect:
Material Preparation
Before molding, dry the PMMA pellets at 80 to 85°C for 4 to 6 hours. This step is essential to remove moisture that causes bubbles and other defects in the finished parts.
Melting and Barrel Conditions
Melt PMMA in the barrel between 220 and 260°C. Use a screw with an L/D ratio greater than 20:1 to ensure good melting and mixing. Proper melting helps achieve a smooth, clear final product.
Injection Pressure and Speed
Maintain injection pressures between 80 and 150 MPa. Inject quickly, especially for thin-walled parts, to fill the mold completely before cooling starts.
Cooling the Mold
Cool the mold uniformly at temperatures between 40 and 80°C. Consistent cooling reduces internal stress and prevents warping or cracking.
Ejection and Post-Processing
After the part is ejected, anneal it at around 80°C for 1 hour. Annealing relieves internal stresses, improving durability and optical clarity.
Following this step-by-step PMMA injection molding process ensures high-quality parts with minimal defects.
Optimal Processing Parameters for Flawless PMMA Parts
Getting perfect PMMA parts starts with dialing in the right processing settings. Here’s a quick cheat sheet to keep your injection molding process smooth and defect-free.
| Parameter | Recommended Range | Notes |
|---|---|---|
| Barrel Temperature | 220°C to 260°C (428°F-500°F) | Uniform melting without overheating |
| Mold Temperature | 40°C to 80°C (104°F-176°F) | Ensures even cooling and less stress |
| Injection Pressure | 80 MPa to 150 MPa | Fast fill to avoid short shots, especially thin walls |
| Drying Temperature | 80°C to 85°C (176°F-185°F) | 4 to 6 hours to remove moisture, prevents bubbles |
| Cycle Time | 30 to 60 seconds | Depends on part size and mold complexity |
Machine Setup
- Use high precision screws to control melt viscosity and ensure smooth flow.
- A screw L/D ratio greater than 20:1 helps achieve better melting and mixing.
- Maintain tight control over barrel zones to avoid overheated or under melted PMMA.
- Regularly check and fine-tune your injection speed for optimal thin-wall filling.
Fine-tuning these parameters keeps your PMMA parts clear, strong, and free from defects like bubbles or stress cracks.
Design Guidelines Mold and Part Optimization for PMMA

Optimizing your mold and part design is key to getting the best results with PMMA injection molding. Follow these practical tips to avoid common issues and improve part quality.
Wall Thickness
- Ideal range: 1.5 to 3 mm
- Keep walls uniform to prevent sink marks and internal stresses
- Avoid thick sections that cause shrinkage and warping
Draft Angles
- Use 1 to 2 degrees draft on vertical walls
- Helps with easy part release from the mold without damage
Radii and Fillets
- Minimum radius of 0.5 mm on all corners and edges
- Reduces stress concentrations and lowers the risk of cracks
Mold Surface Finish
| Feature | Recommendation | Benefit |
|---|---|---|
| Mirror polish SPI A1 | Use for optical parts | Clear and smooth finish |
| Hot runners | Maintain consistent flow | Reduce waste and cycle time |
CAD Design Tips
- Avoid sharp corners that cause flow hesitation and stress points
- Use simulation tools like Moldflow to check flow and cooling before making molds
- Design for balanced flow to reduce weld lines and sink marks
Case Study Highlight
A lens mold redesign following these guidelines increased yield to 99.9%, showing how proper design optimizations directly improve quality and reduce scrap.
By paying attention to these design rules, you ensure your PMMA parts not only look great but also perform reliably in their applications.
For more on optimizing optical plastic molding, check out our guide on [optical PMMA parts].
Common Defects in PMMA Molding and Proven Fixes
When molding PMMA, certain defects can pop up that affect the quality and clarity of your parts. Here’s a quick look at the usual suspects and how to fix them:
Bubbles
- Cause: Moisture trapped in the material.
- Fix: Always dry PMMA thoroughly before molding. Use vacuum drying and venting in the mold to release any trapped gases.
Sink Marks
- Cause: Thick sections cool unevenly, causing surface dents.
- Fix: Design parts with uniform wall thickness. Lower the hold pressure and consider annealing parts to reduce internal stresses.
Weld Lines
- Cause: Poor or slow flow of molten PMMA where two flow fronts meet.
- Fix: Increase melt temperature to improve flow. Optimize gate placement to ensure smooth material convergence and reduce weld lines.
Stress Cracks
- Cause: Rapid cooling causes internal stresses leading to cracks.
- Fix: Control mold temperature with a gradual ramp-up. Slow down cooling to let parts relax and prevent stress buildup.
By addressing these issues upfront, you can get flawless, clear PMMA parts every time with injection molding.
Applications and Industries Leveraging PMMA Molding
PMMA injection molding is popular across several industries thanks to its clarity, durability, and ease of processing. Some of the top uses include:
- Automotive: PMMA parts are widely used for taillights and interior panels since they offer excellent light transmission and weather resistance.
- Medical Devices: The material’s biocompatibility and precision molding make it ideal for medical tools, lenses, and protective housings.
- Displays and Lighting: PMMA is perfect for screens, light diffusers, and camera lenses because it delivers superior optical clarity.
- Aquariums and Signage: Its UV resistance and toughness make it great for large aquarium panels, outdoor signs, and protective covers.
Many companies in the U.S. benefit from custom PMMA prototypes with fast turnaround times—often just one week—allowing rapid product development and testing. This makes PMMA molding a go-to choice for projects requiring quick, high-quality transparent parts.
Cost Factors Sustainability and Next Steps with PMMA Injection Molding
When it comes to PMMA injection molding, cost plays a big role in deciding if it’s the right fit for your project. On average, raw PMMA material costs range from $0.01 to $0.05 per gram, making it a competitive choice for clear plastic parts. Tooling expenses, depending on mold complexity and size, usually fall between $5,000 and $50,000. This upfront investment pays off quickly in high-volume runs thanks to PMMA’s excellent flow and finish quality.
Sustainability is another key advantage. PMMA is 100% recyclable, and processing it requires less energy compared to other plastics like polycarbonate. This makes PMMA a more environmentally friendly option, especially for companies prioritizing green manufacturing.
Ready to get flawless PMMA parts? Take advantage of our free PMMA design review—upload your CAD files now for expert feedback and optimize your injection molding project before you start.