Learn the essentials of tack welding with step-by-step tips for beginners to ensure precise alignment and strong, distortion-free welds.
Ever struggled with parts shifting mid-weld or facing distortion that ruins your project? If you’re diving into metalwork, mastering tack welding is the game-changer you need. These small, temporary welds might seem simple, but they’re crucial for locking pieces in perfect alignment before laying down the final bead. Whether you’re a beginner or a weekend DIYer, getting your tacks right saves time, materials, and frustration—and sets the stage for flawless welds every time. Ready to learn how to tack weld like a pro and prevent those common welding headaches? Let’s jump in!
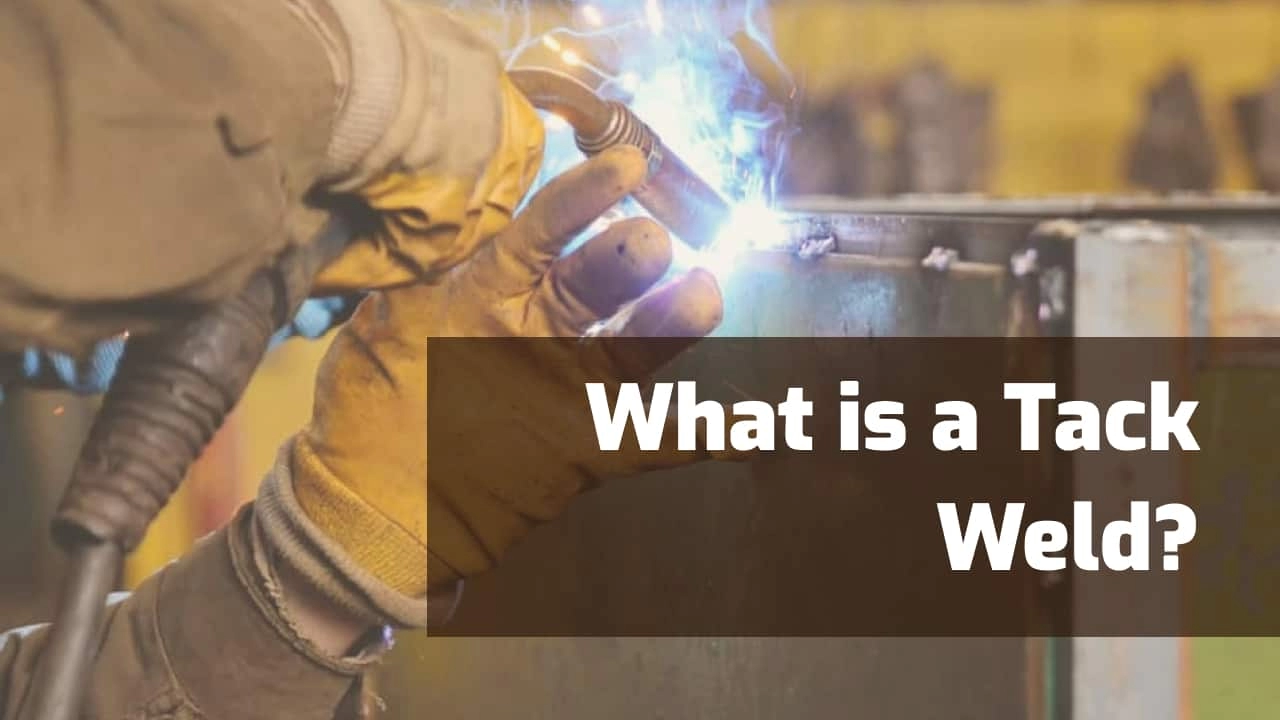
What is Tack Welding Breaking Down the Basics
You might be wondering, what exactly is tack welding and why should I care? Simply put, tack welding refers to those small, temporary welds that hold metal pieces in place before completing the full weld. Think of it as the “glue” that keeps parts stable while you work, ensuring everything stays aligned and ready for the final pass.
Tack welds serve a clear, practical purpose. They allow you to maintain joint geometry without clamps, reduce movement, and help control heat distribution. This means less warping and distortion while keeping your work accurate—important whether you’re fabricating a frame or repairing a broken part.
A quick history lesson: Tack welding isn’t new. It’s been part of welding since the early days as a simple solution to hold parts together before full welding tech advanced. Over time, it evolved with different welding methods like MIG, TIG, and Stick, adapting but always keeping that core function of temporary stabilization.
Still, tack welding gets some bad rap. Some folks think tack welds are weak or careless shortcuts. That’s a big misconception. When done right, tack welds are precise, intentional, and critical to a solid, professional weld. Missing or sloppy tacks? That’s the real problem.
If you’re getting into welding, mastering tack welding is like learning to tie your shoes before running a marathon. Nail this basics step, and you’ll set yourself up for smoother, stronger welds every time.
Ready to learn when and where to tack weld? Let’s get into the real-world use cases next!
When and Where to Use Tack Welding Real World Applications
Tack welding is a go-to method in many fabrication and repair jobs where you need to hold parts in place before doing the full weld. It’s perfect for situations that demand precise alignment or when you want to control heat to avoid warping the metal. For example, if you’re working on a large frame or a piece with complex geometry, tack welds help keep everything steady without permanently locking parts too early.
Industries across the board rely on tack welding. Manufacturing plants use it to speed up assembly lines by quickly joining components. The automotive industry counts on tack welding for bodywork repairs and assembly because it allows quick positioning and reduces distortion. Even construction and HVAC sectors lean on tack welds when fitting pipes and structural parts.
When you compare tack welding to clamps or spot welding, tack welds offer more flexibility. Clamps can sometimes shift under heat or pressure, and spot welds aren’t always suitable for thicker materials or complex joints. Tack welds create temporary bonds that let you adjust alignment before committing to the final weld, which is a real advantage during tricky jobs.
If you’re working with materials that expand or contract a lot, like aluminum or thin steel, tack welding requires some extra care:
- Keep tack welds small and spaced evenly to manage heat build-up.
- Allow pieces to cool between tacks to prevent distortion.
- Use a welding sequence that balances heat distribution across the joint.
In these cases, careful tack welding helps prevent warping and keeps your project on track.
Types of Tack Welds Choosing the Right Pattern for Your Project
Selecting the right tack weld pattern is key to strong, stable joints. Here are common types of tack welds and when to use them:
- Bridge tacksPerfect for filling gaps in pipe edges or uneven surfaces. These help hold parts together firmly before final welding.
- Square pattern tacksBest for right-angle joints, like in metal frames. Placing tacks in a square pattern keeps the joint aligned and evenly distributes heat.
- Vertical alignment tacksUsed for stacking pieces vertically, such as plates or sheets. These tacks prevent slipping or shifting during the welding process.
- T-joint tacksIdeal for perpendicular intersections where one metal piece meets another at a T shape. These tacks stabilize the joint before running the full weld bead.
Factors to Consider When Choosing Tack Patterns
- Material thickness: Thicker materials may need more tacks spaced further apart, while thinner metals require closer, smaller tacks to avoid warping.
- Joint length: Longer joints need more tacks spread evenly to maintain alignment throughout.
- Heat distribution: Patterns should help minimize welding distortion by balancing heat input across the joint.
By matching your tack weld pattern to the specific joint and material, you set up a better base for your final weld, improving strength and reducing problems down the line.
How to Tack Weld Step by Step Guide for MIG TIG and Stick
Tack welding might seem simple, but getting it right takes some prep and practice. Here’s a straightforward guide to help you tack weld effectively using MIG, TIG, and Stick methods.
cURL Too many subrequests.
- cURL Too many subrequests.cURL Too many subrequests.
- cURL Too many subrequests.cURL Too many subrequests.
- cURL Too many subrequests.cURL Too many subrequests.
- cURL Too many subrequests.cURL Too many subrequests.
cURL Too many subrequests.
- cURL Too many subrequests.
- cURL Too many subrequests.
- cURL Too many subrequests.
- cURL Too many subrequests.
- cURL Too many subrequests.
cURL Too many subrequests.
- Use cURL Too many subrequests. cURL Too many subrequests.
- cURL Too many subrequests.
- Use a lower voltage than for full welds to reduce heat input.
Specific Tips for TIG Tack Welding
- Use a foot pedal or fingertip control for precise heat control.
- Keep the tungsten electrode close but avoid touching the base metal.
- Use pulsing technique if your machine has it to control heat better.
Specific Tips for Stick Tack Welding
- Use smaller electrodes suitable for tack welds to avoid heavy heat buildup.
- Hold the rod at about a 20-30 degree angle.
- Strike the arc quickly and stop once the tack forms; avoid building a large puddle.
Safety Precautions to Follow
- Ensure good ventilation to avoid fumes.
- Wear flame-resistant clothing.
- Keep a fire extinguisher nearby.
- Avoid touching hot metal right after welding.
- Always inspect your gear before starting.
Following these steps helps you create solid, reliable tack welds that serve as the perfect setup for your final welds.
Tack Welding Best Practices and Common Mistakes to Avoid
When it comes to tack welding, getting the size, spacing, and cooling right is crucial for a solid setup. Here are some key tips to keep your tacks effective and your project on track:
- Size matters: Make your tack welds just big enough to hold the pieces together firmly. Too small, and they won’t hold; too big, and they can cause warping or make it harder to finish the final welds.
- Spacing is key: Space your tacks evenly along the joint—usually every 2 to 4 inches depending on the material and joint type. Proper spacing helps avoid distortion and ensures the pieces stay aligned.
- Let them cool: Allow tack welds to cool naturally before moving or adding more tacks. This prevents stressing the metal and reduces chances of cracking or warping.
Watch out for these common mistakes:
- Overheating the tack welds can distort your workpiece or burn through thin metals.
- Poor spacing leads to weak alignment and might cause joint warping during the final welding.
- Rushing the cooling process can cause cracks or uneven tension on the joint.
For working with different materials, here’s how to step it up:
- Thin metals need lighter tacks with lower heat input to prevent burn-through.
- Thicker materials require bigger, stronger tacks with slightly more heat to hold properly.
If you run into problems like joints shifting or tacks breaking, check:
- Are you using the right heat settings?
- Did you space your tacks evenly?
- Are the surfaces clean and properly prepared?
Following these best practices reduces mistakes and sets you up for a smooth welding job every time.
Pros and Cons of Tack Welding Is It Right for Every Job
cURL Too many subrequests.
cURL Too many subrequests.
- cURL Too many subrequests.cURL Too many subrequests.
- Cost-EffectivecURL Too many subrequests.
- cURL Too many subrequests.cURL Too many subrequests.
- cURL Too many subrequests.cURL Too many subrequests.
cURL Too many subrequests.
- cURL Too many subrequests.cURL Too many subrequests.
- cURL Too many subrequests.cURL Too many subrequests.
- cURL Too many subrequests.cURL Too many subrequests.
cURL Too many subrequests.
- cURL Too many subrequests.cURL Too many subrequests.
- Critical Safety Applications: Avoid using tacks where the weld needs to be fully reliable from the start, like pressure vessels or load-bearing frames.
- Thin Metals Without Proper Technique: Tack welding thin sheets without correct settings can cause burn-through or warping.
Final Take on Tack Welding
Tack welding is a handy technique for fabrication and repairs that need accurate setup and minimal heat. It’s perfect as a pre-weld tacking step to save time and improve joint geometry. But don’t treat tacks like full welds—they’re only part of the process. For the US market, especially in manufacturing and automotive work, tack welding helps balance efficiency and quality when done right. Just keep the limitations in mind, and use tack welds as a tool—not a shortcut.