Discover expert tips and best tack welder tools for beginners to achieve precise temporary welds and efficient metal repairs at home.
What Is Tack Welding Breaking Down the Basics
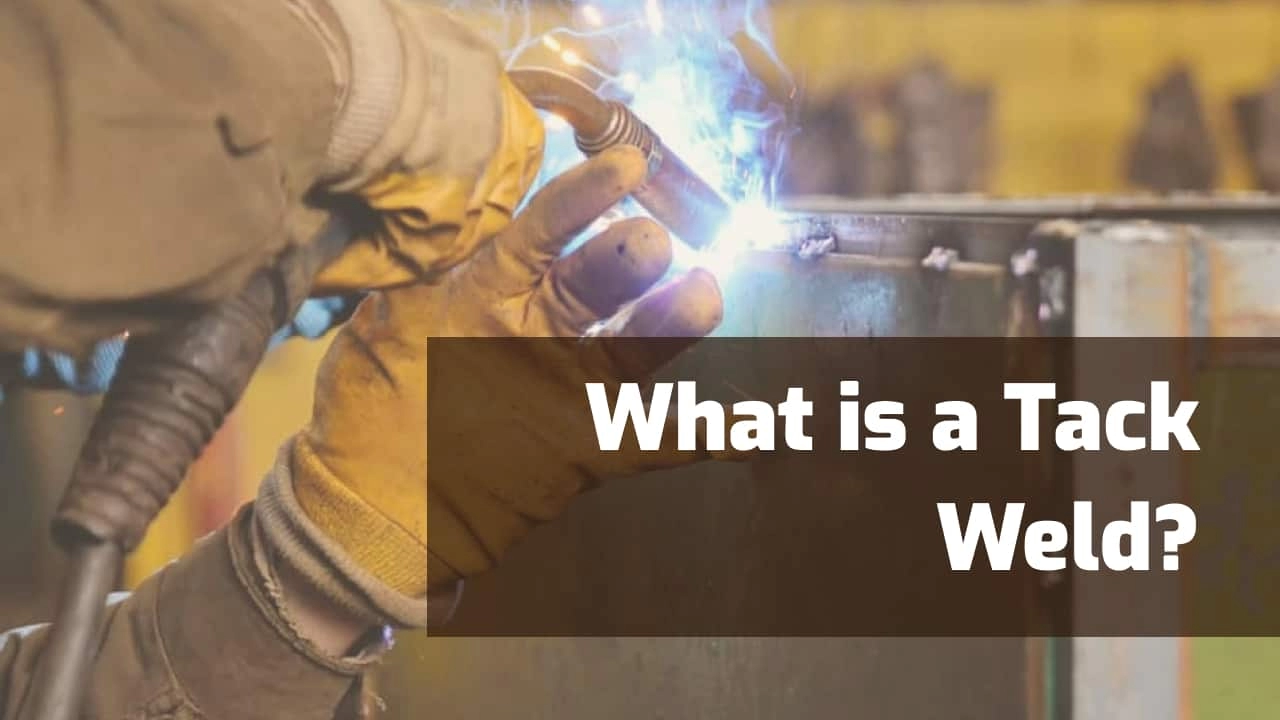
Tack welding is a temporary welding technique used to hold metal pieces in place before the final weld is applied. Think of it as spot-checking or clamping with metal. It helps maintain proper alignment and ensures parts don’t shift during the welding process.
Types of Tack Welds
There are several common types of tack welds used depending on the joint and application:
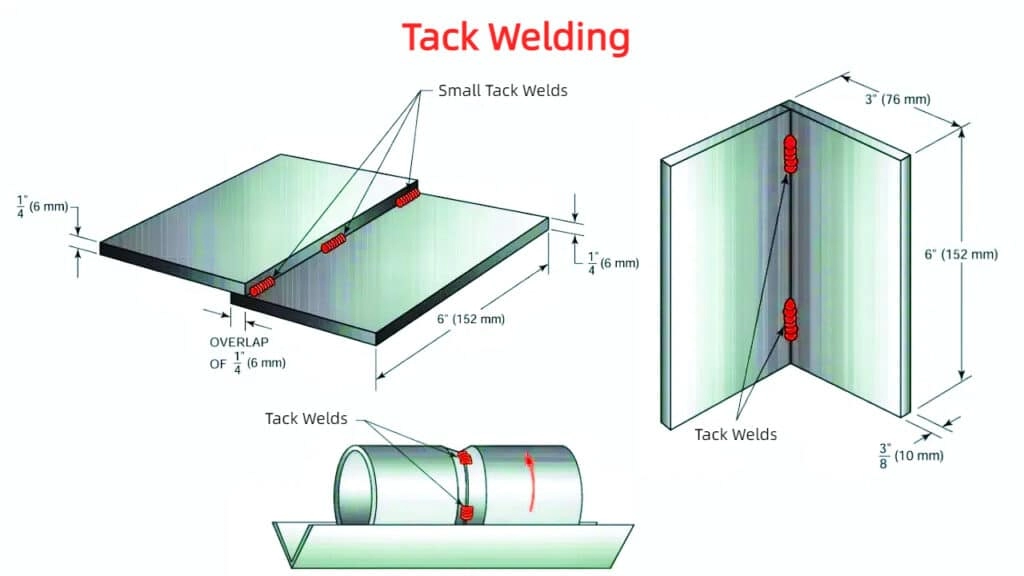
- Standard tack welds – small weld spots placed along a joint to hold pieces together.
- Bridge tack welds – connect two overlapping parts by welding a small bridge-shaped bead.
- Right-angle tack welds – used to secure perpendicular or corner connections quickly.
Common Materials and Thickness Limits
Tack welding works well on a variety of metals like:
- Mild steel (the most popular choice)
- Stainless steel (requires more care)
- Galvanized steel (needs attention to fumes and surface prep)
The typical thickness range for tack welding is between 18 gauge to 1/4 inch. Thinner or thicker materials might need specialized techniques or equipment.
Pros and Cons of Tack Welding
Advantages:
- Great for alignment accuracy during fabrication
- Reduces risks of distortion and warping compared to longer welds
- Makes the final welding faster and cleaner
- Helpful for complex assemblies needing precise positioning
Drawbacks:
- Tacks alone aren’t strong bonds—final welds are essential
- Poor tack spacing or size can lead to movement or uneven heat distribution
- Requires some skill to ensure proper penetration without overheating
In , tack welding is a fundamental skill for anyone working with metal. It’s a quick, efficient way to hold parts securely and ensure your final welds come out strong and straight.
How Tack Welding Works Step by Step Process for Beginners
Prep Phase
Before you start tack welding, preparation is key. Make sure the metal surfaces are clean—remove rust, paint, and oil with a wire brush or grinder. Measure the gaps between the pieces to ensure proper fit-up. If needed, use clamps or magnets to hold your workpieces tightly in place. Good alignment at this stage saves headaches later.
Execution Steps
- Select Welder Settings: Choose the right amperage and wire feed speed if using MIG. For stick or flux core, pick electrodes suitable for the metal type and thickness.
- Position Pieces: Double-check that your materials are lined up as planned, with proper spacing for the weld pool.
- Apply Short BurstscURL Too many subrequests.
- cURL Too many subrequests.cURL Too many subrequests.
- cURL Too many subrequests.cURL Too many subrequests.
cURL Too many subrequests.
- cURL Too many subrequests.cURL Too many subrequests.
- cURL Too many subrequests.cURL Too many subrequests.
- cURL Too many subrequests.cURL Too many subrequests.
cURL Too many subrequests.
- cURL Too many subrequests.cURL Too many subrequests.
- cURL Too many subrequests.cURL Too many subrequests.
cURL Too many subrequests.
cURL Too many subrequests.
cURL Too many subrequests.
Essential Gear for Tack Welding
- Portable MIG Welders – Great for beginners and sheet metal. Easy to use and versatile.
- Stick Welders (Inverter Stick Welders) – Perfect for outdoor jobs and thicker materials.
- Electrodes and Wire – Choose electrodes that match your metal type. Flux core wire works well for quick tacks and weather resistance.
- Wire Clamps and Clamps – Holding your pieces steady is a must for alignment accuracy.
- Welding Gloves, Helmet, and Protective Clothing – Safety gear is non-negotiable.
Top Tack Welder Recommendations
- Budget Pick: For casual or beginner welders, a compact portable MIG welder from brands like Lincoln Electric or Hobart gets the job done without breaking the bank.
- Mid-Range: If you’re tackling moderate projects, look for mid-power inverter stick welders that offer adjustable amperage and better portability.
- Pro Pick: Heavy-duty TIG or multi-process welders are ideal for precision tacks in automotive work or metal fabrication shops.
Tack Welder Comparison Table
| Welder Type | Amperage Range | Portability | Price Range | Best For |
|---|---|---|---|---|
| Portable MIG | 90-180 Amps | Lightweight | $300 – $700 | Sheet metal, DIY repairs |
| Inverter Stick | 40-160 Amps | Very portable | $200 – $600 | Outdoor, thicker steel |
| TIG (Pro) | 5-200 Amps | cURL Too many subrequests. | $1000+ | Precision welds, automotive |
When to Use Specialized Tack Welders
Some projects need specialized gear:
- Dental and Jewelry Welders: Miniature tack welders for fine, delicate metals.
- Mini Portables: Great for tight spots and lightweight metalwork.
- cURL Too many subrequests.cURL Too many subrequests.
cURL Too many subrequests.
cURL Too many subrequests.
cURL Too many subrequests. cURL Too many subrequests. or cURL Too many subrequests.. cURL Too many subrequests.
cURL Too many subrequests., cURL Too many subrequests. cURL Too many subrequests.
cURL Too many subrequests., cURL Too many subrequests. cURL Too many subrequests.
Common Applications
- cURL Too many subrequests.
- cURL Too many subrequests.
- cURL Too many subrequests.
- cURL Too many subrequests.
cURL Too many subrequests.
- Overlap your tacks slightly to increase strength
- Always clean tack points before your final weld to avoid contamination
- Use short bursts when tacking to control heat buildup and keep distortion low
Following these steps and choosing the right technique can boost your weld quality and make your projects smoother.
Tack Welding vs Other Methods Spot Welding Clamping and More
When you’re deciding between tack welding, spot welding, or using clamps, it helps to know the key differences and advantages of each.
Tack Welding vs Spot Welding
- Tack Welding creates small, temporary welds that hold metal pieces in place. It’s great for alignment before doing a full weld.
- Spot Welding uses pressure and electric current to fuse metal layers at spots, mainly for sheet metal. It’s faster but less flexible than tack welding.
Pros of Tack Welding:
- Better control over alignment
- Less heat build-up, meaning reduced metal distortion
- Easier to correct positions before the final weld
Cons of Tack Welding:
- Takes more time than spot welding
- Requires welding skill and equipment
When to Choose Tacks Over Clamps
- Tack welds are ideal when heat-affected zones matter or when metal parts can shift during welding.
- Clamps are good for initial positioning but don’t prevent tiny movements under heat.
- Tack welds offer stronger temporary holds that ensure better overall alignment for the final weld.
Integration in Full Workflows
In most metalworking jobs, tack welding works hand-in-hand with clamps and other methods. You might start with clamps for rough placement, add tack welds for solid holds, then finish with full welds or spot welding for strength. This combination cuts down on warping and improves accuracy.
Choosing the right method depends on your project size, materials, and how precise you need your welds to be. For many DIY metal repair and automotive fabrication tasks, tack welding strikes the perfect balance of control and efficiency.
Troubleshooting Common Tack Welding Issues and Pro Fixes
When your tack welds come out weak, the first thing to check is your amperage settings. Too low, and the weld won’t hold. Try increasing the amperage bit by bit until your tacks are strong but not burning through the metal.
If you’re noticing distortion or warping, it usually means the heat is concentrated too much in one area. A simple fix is to change your tacking sequence—alternate spots to spread out the heat and keep the metal flat.
cURL Too many subrequests. contamination problems like poor welds or spatter, always clean the surfaces first. Use solvents or a wire brush to remove rust, oil, or paint before starting. Clean workpieces make a huge difference for solid tacks.
Don’t forget regular maintenance. Check your electrodes for wear and replace them if needed. After tacking, grinding down rough spots helps prep the surface for final welds and ensures a smooth finish.
These quick fixes help keep your tack welding strong and reliable every time.