Discover the key differences between MIG vs TIG welding to choose the best process for your projects with expert tips and clear comparisons.
What Is MIG Welding A Quick Primer Core Mechanics
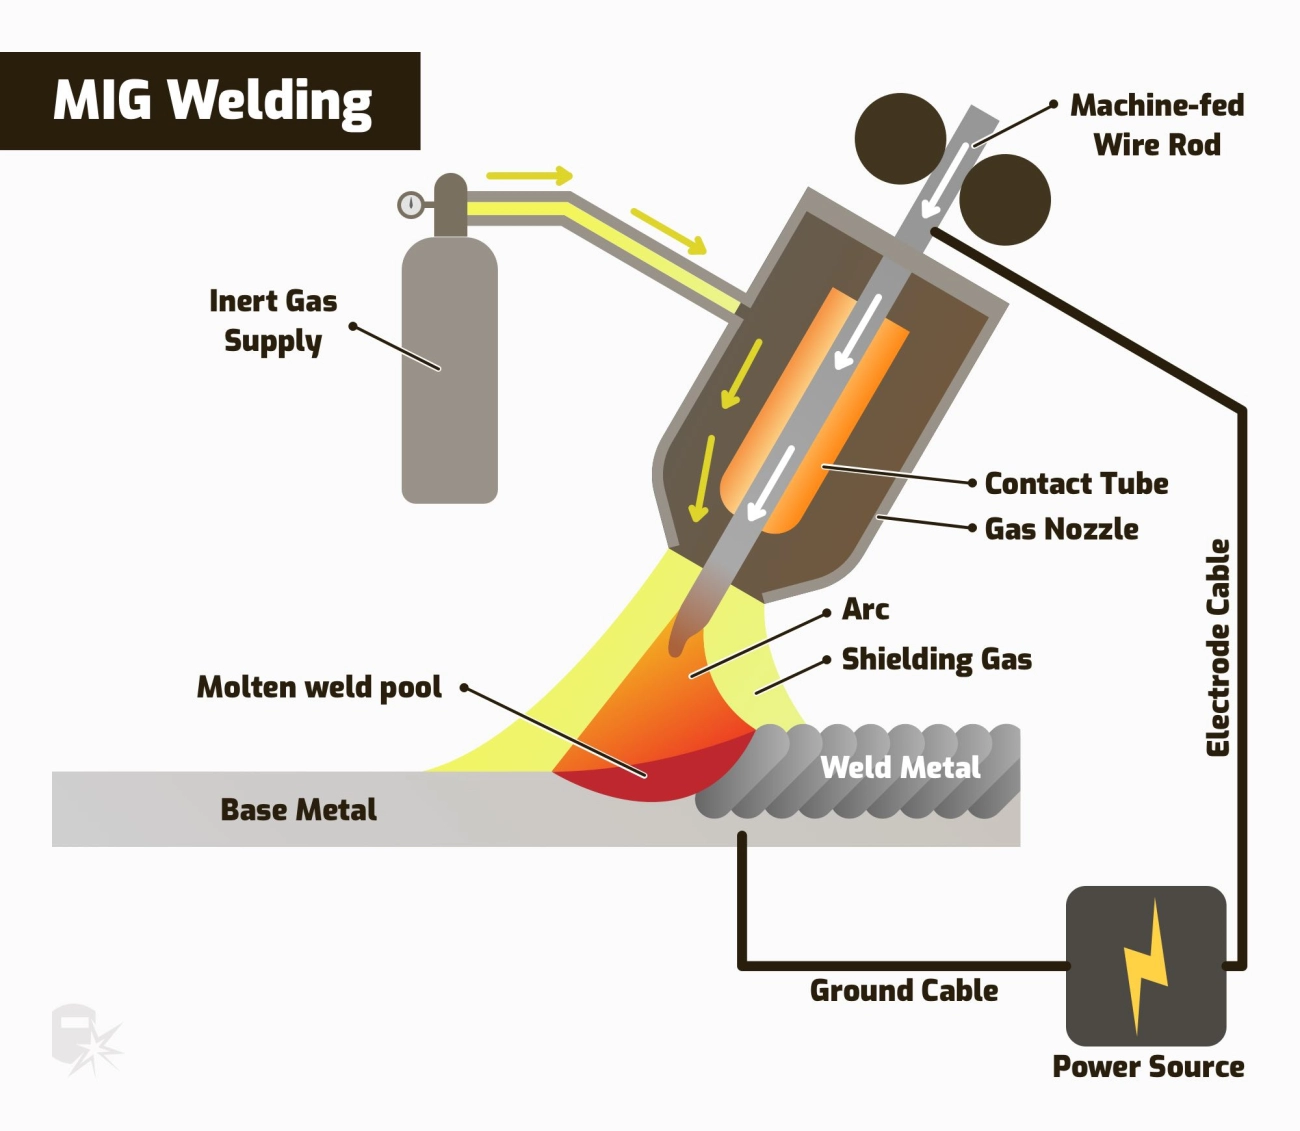
MIG welding, short for Metal Inert Gas welding, is a popular welding process known for its speed and ease of use. It falls under the category of gas metal arc welding (GMAW), which means it uses an electric arc to join metals. The core mechanic involves a continuous wire electrode fed through a welding gun, melting and fusing base metals together.
Here’s how it works in simple terms:
- A spool of wire feeds through the gun automatically.
- An electric arc forms between the wire and the metal workpiece.
- The arc melts the wire and base metal, creating a molten pool.
- A shielding gas, typically argon or a mix with carbon dioxide, protects the weld from contamination and oxidation.
Because of this setup, MIG welding offers a steady, controlled arc that easily handles a variety of metals like steel, aluminum, and stainless steel. It’s widely used for structural work, automotive repairs, and general fabrication. The continuous wire feed and shielding gas make it much faster than some other welding methods, especially when dealing with thicker metals.
Understanding these core mechanics helps explain why MIG welding is often the go-to choice for beginners and professionals looking for efficiency without sacrificing quality.
What Is MIG Welding A Quick Primer Ideal Setups and Costs
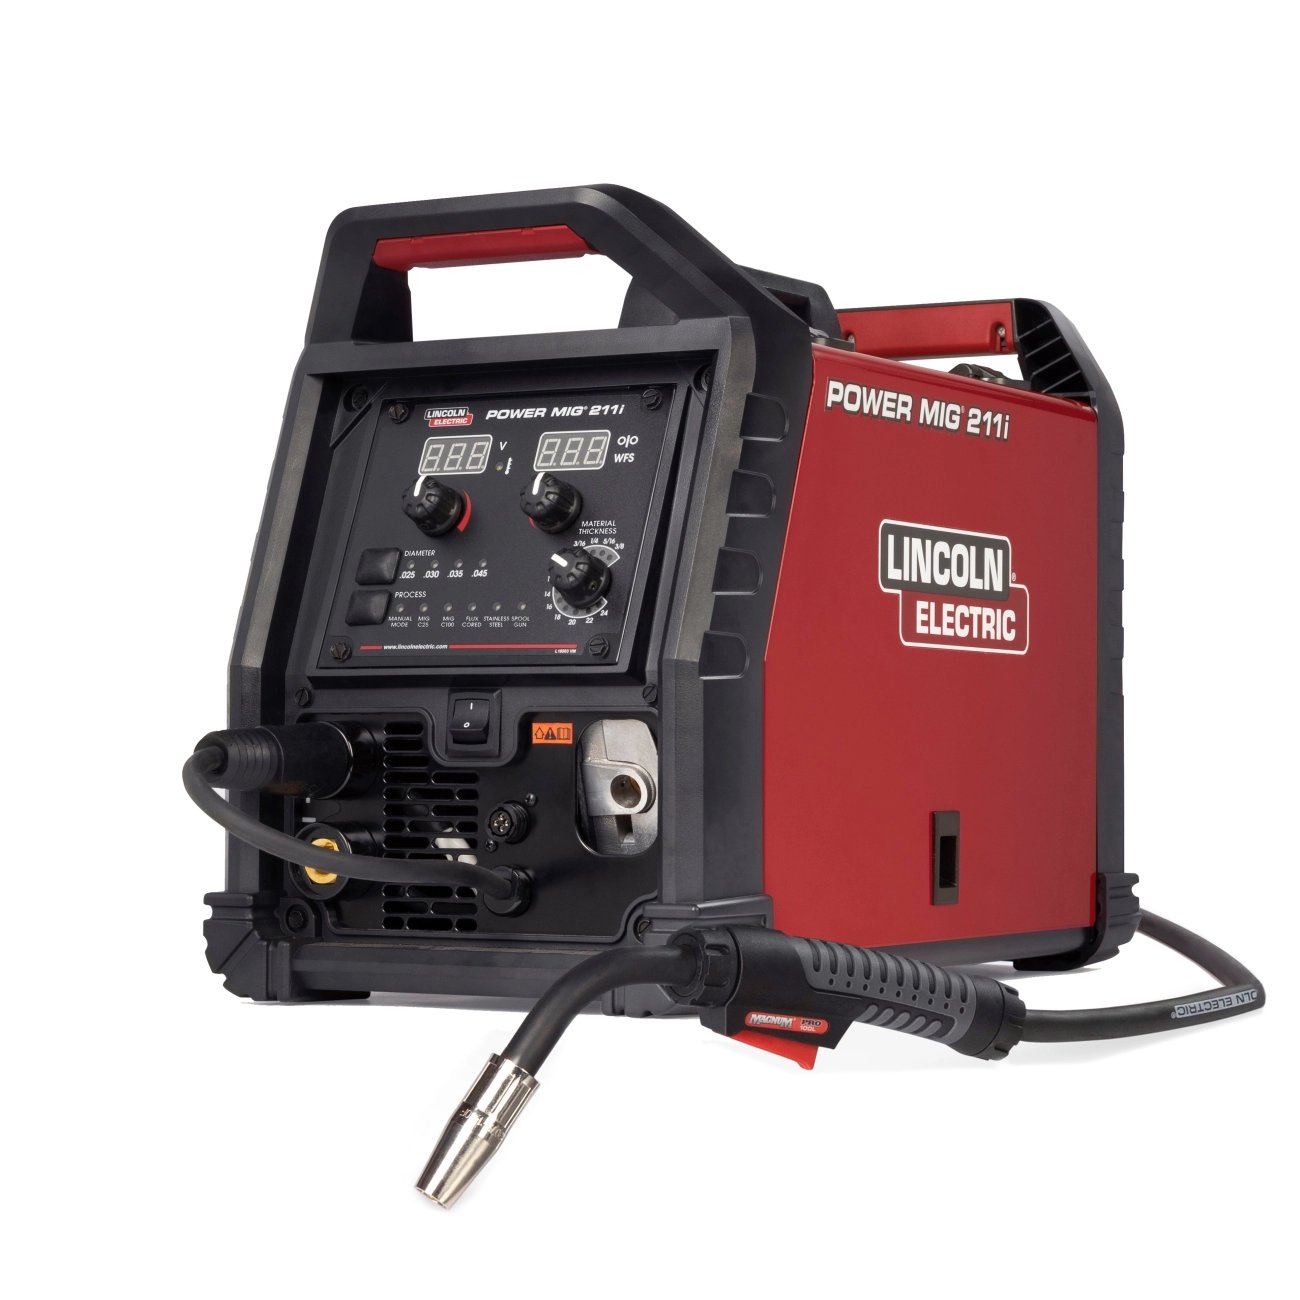
MIG welding, or gas metal arc welding, is popular because it’s straightforward and fast. Setting up a MIG welder usually means getting a power source, a wire feeder, a spool of wire (the filler), and a shielding gas tank—often a mix of argon and CO2. The good news is, you don’t need a ton of extra gear to get started.
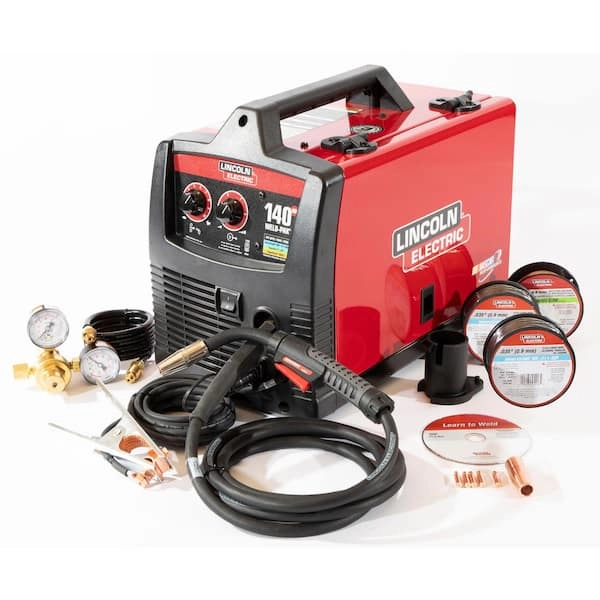
When it comes to costs, MIG welders are generally more affordable upfront compared to TIG machines. Entry-level MIG welders typically run from $300 to $800, making them a solid choice for DIYers and small shops. Plus, consumables like wire and shielding gas are easy to find and relatively inexpensive.
For ideal setups, think about:
- Power Source: A reliable welder with adjustable voltage to handle different metals and thicknesses.
- Wire Type: Basic steel wire is cheap and works for most projects, but you can upgrade to stainless or aluminum wires.
- Shielding Gas: A common mix like 75% argon and 25% CO2 keeps the weld clean and stable.
- Work Area: MIG works best with a clean, ventilated space since the gas shields the weld zone from contamination.
Overall, MIG welding setups balance cost and convenience well, which is why they’re a go-to for many U.S. welders tackling metal fabrication, automotive repair, and light construction.
What Is TIG Welding Mastering Precision Core Mechanics
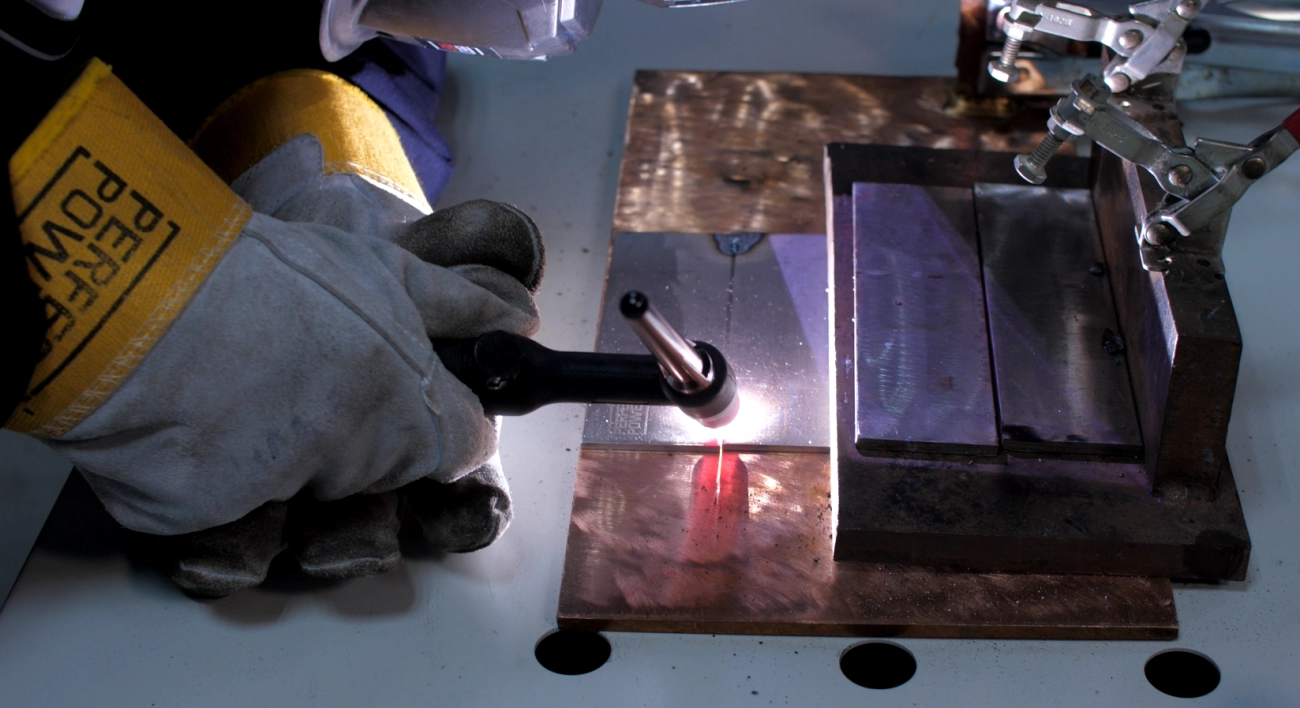
TIG welding, also called tungsten inert gas welding, is all about control and accuracy. Instead of melting a wire automatically like MIG, TIG uses a non-consumable tungsten electrode to create the arc. You feed the filler metal separately by hand, which means you decide exactly how much goes in and where. This setup gives you much finer control over the weld puddle, allowing for precise, clean welds.
The process uses an inert shielding gas—usually argon—to protect the weld from contamination while it’s being formed. Since there’s no spatter and the heat is easier to manage, TIG welds look neater and work great on thin metals or stainless steel where precision is key.
In short, TIG welding is ideal when you need a highly detailed, smooth finish. It’s popular for projects that require clean joins with minimal cleanup and works well on a variety of metals, especially where the strength and appearance of the weld matter most.
What Is TIG Welding Mastering Precision Ideal Setups and Costs
TIG welding is all about control and precision, which means the equipment you need is a bit more specialized. A typical TIG welding setup includes a power source, a TIG torch with a tungsten electrode, a foot pedal or fingertip control for adjusting heat, and a supply of shielding gas—usually pure argon. This setup lets you manage the weld bead with fine detail, making it great for thin metals and intricate projects.
When it comes to costs, TIG welders generally run higher than MIG setups. Expect to spend anywhere from $700 to $1,500 for a reliable TIG welder, depending on power and features. Shielding gas and tungsten electrodes add to ongoing costs but are necessary for clean, high-quality welds. Also, TIG requires more accessories like filler rods and a quality gas regulator, so factor those in when budgeting.
In short, TIG setups suit those serious about detailed work and quality welds. While it requires more investment upfront compared to MIG welding, the precision you get makes it a smart choice for projects where appearance and weld integrity matter most.
Head-to-Head MIG vs TIG Differences That Matter Electrode and Filler Breakdown

When comparing MIG vs TIG, one of the biggest differences lies in how they handle electrodes and filler materials.
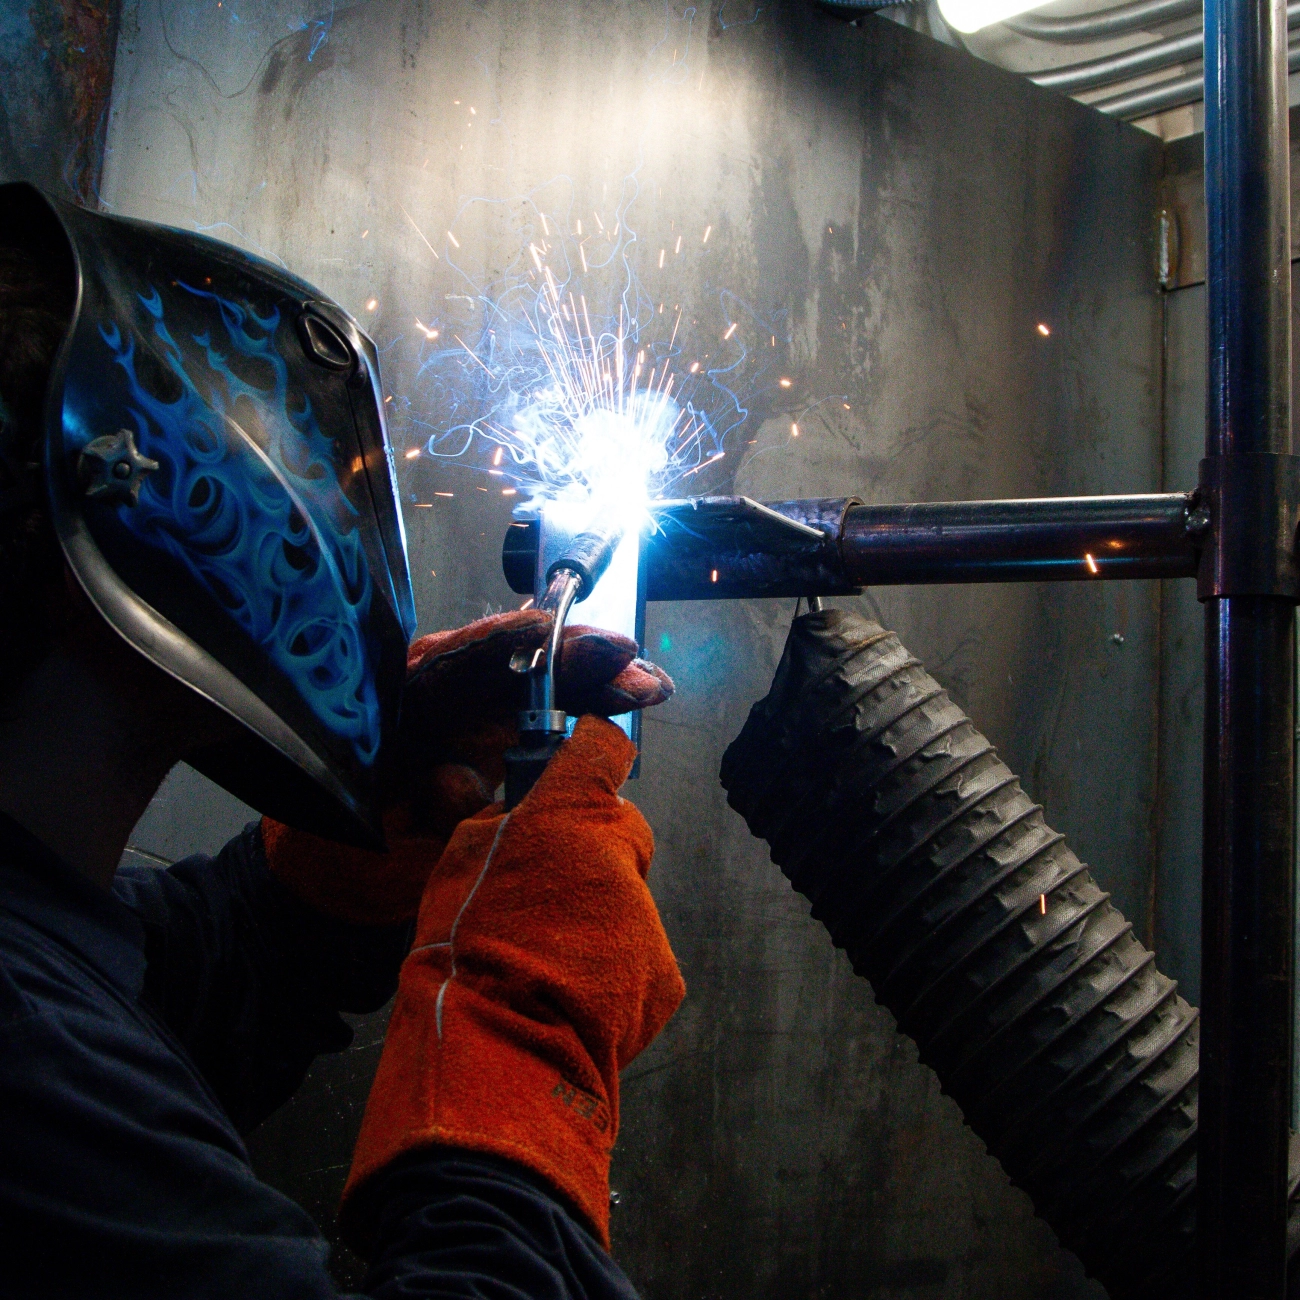
MIG welding uses a consumable wire electrode that doubles as the filler. The wire continuously feeds through the gun, melting into the weld pool. This makes MIG quick and easy, perfect for fast jobs and thicker metals. Because the electrode melts away, you don’t have to stop and add filler by hand.
TIG welding takes a different approach. It uses a non-consumable tungsten electrode that produces a precise arc but doesn’t melt itself. Instead, you add filler material separately, usually by hand, dipping a rod into the weld pool. This method gives you fine control over the weld and makes TIG ideal for thin metals and detailed jobs.
To sum up:
- MIG electrode: Consumable wire + filler combined, automated feed
- TIG electrode: Non-consumable tungsten; filler added manually
This basic difference impacts how each process feels and performs, with MIG focusing on speed and simplicity, and TIG on precision and control. Knowing this helps you pick the right tool for your project.
Head-to-Head MIG vs TIG Differences That Matter Shielding Gas and Arc Stability
One major difference between MIG and TIG welding lies in the shielding gas and how it affects arc stability. MIG welding, also known as gas metal arc welding, typically uses a mix of argon and carbon dioxide or straight CO2. This mix offers a stable arc and decent penetration, making MIG great for quick, consistent welds on thicker metals like steel and aluminum. The shielding gas in MIG helps protect the weld pool from contamination but is generally less sensitive to environmental factors, which makes it easier to weld outdoors or in less-controlled environments.
TIG welding, on the other hand, uses pure argon or sometimes helium as shielding gas. This creates a much cleaner and more focused weld with better arc control and precision. The argon environment in TIG provides excellent protection against oxidation, which is essential when working with thin or stainless steel metals. Because the arc in TIG is more sensitive to disturbances, maintaining arc stability requires steady hands and controlled conditions, usually in indoor settings.
of shielding gas and arc stability:
| Aspect | MIG Welding | TIG Welding |
|---|---|---|
| Shielding Gas | Argon + CO2 mix or CO2 | Pure Argon or Argon-Helium mix |
| Arc Stability | Stable, less sensitive to drafts | Highly stable but sensitive to airflow |
| Suitability for Outdoors | Better for outdoor or drafty areas | Best in controlled, indoor spaces |
| Impact on Weld Quality | Good penetration, less precise | High precision, cleaner welds |
Knowing these differences helps you choose the right process for your job. If you want speed and stability in various conditions, MIG’s gas mix and arc are your friends. For precision and superior finish, especially on thin or stainless steel, TIG’s shielding gas and arc control stand out.
Head-to-Head MIG vs TIG Differences That Matter Speed Skill Level and Output Quality
When it comes to speed, MIG welding clearly has the advantage. Because it uses a continuous wire feed, you can cover larger areas faster, making it a go-to for quick jobs and production work. TIG welding, on the other hand, is slower because it requires more control—feeding the filler rod by hand while maintaining a steady arc with a tungsten electrode. This makes TIG better suited for precision work rather than high-speed projects.
Skill level is another big difference. MIG welding is more forgiving and easier to learn, which is why it’s popular among beginners and DIY enthusiasts. TIG welding demands a higher level of skill and patience since the welder has to manage multiple tasks at once. This makes TIG ideal for experienced welders who want cleaner, more precise welds.
When it comes to output quality, TIG shines on thin metals and materials like stainless steel and aluminum. It produces a clean, strong weld with minimal spatter and distortion. MIG welding is good for thicker materials and where speed is critical, but it can leave more slag and requires more cleanup.
In :
- Speed: MIG is faster, TIG is slower
- Skill Level: MIG is beginner-friendly, TIG needs practice
- Output Quality: TIG offers higher precision, MIG suits heavier, fast jobs
Knowing these differences helps you pick the right welding process for your project’s speed, skill, and quality needs.
When to Choose MIG Projects That Demand Efficiency Top Applications
MIG welding is your go-to for projects where speed and efficiency matter most. It’s perfect when you need to crank out strong, clean welds quickly without fussing over every little detail. Here are some top applications where MIG really shines:
- Automotive repairs and fabrication: Great for fixing car frames, exhaust systems, and body panels fast.
- Home DIY projects: Ideal for building metal furniture, garden gates, or simple steel structures.
- Sheet metal work: Works well with thicker metals and can handle a variety of steel grades, including mild steel.
- Industrial maintenance and construction: Keeps things moving with high output and less downtime.
- Production welding: Common choice in factories where repeatability and speed help meet quotas.
If your project calls for efficiency and you want reliable, solid welds without the steep learning curve, MIG welding is often the smarter pick. It’s also a favorite for most beginners who want a fast start and good results on a budget.
When to Choose MIG Projects That Demand Efficiency Real World Tips
MIG welding shines when you need to get the job done fast without sacrificing too much quality. It’s perfect for projects where speed and volume matter—think automotive repairs, metal fabrication, or building fences and gates. Here are some real-world tips to get the most out of MIG welding for efficient projects:
- Prep your metal surface well. Clean, rust-free metal helps the wire feed smoothly and keeps the weld strong.
- Use the right wire and gas combination. For most steel projects, a solid wire with a mix of argon and CO2 gas offers great arc stability and speed.
- Keep a steady hand and consistent travel speed. This helps prevent defects like porosity or spatter, keeping your welds clean and strong.
- Set the machine properly for your metal thickness. Too low or high voltage slows down the process or creates weak welds.
- Practice simple, straight beads. Complex joints can slow you down; save those for TIG or specialized MIG techniques.
- Use a spool gun for aluminum. It may cost more but saves time and frustration compared to other methods.
When you’re working on bigger or repetitive tasks, MIG welding cuts down the time significantly compared to other arc welding types. It’s a go-to choice for pros and hobbyists alike who value efficiency but still want solid welds.
When to Choose TIG Projects That Require Artistry Top Applications
TIG welding shines when your project demands clean, precise, and detailed work. It’s the go-to for tasks where appearance and control are key. Here are some top applications where TIG welding truly stands out:
- Thin Metals: TIG is perfect for welding thin gauge steel, aluminum, and stainless steel without warping or burning through.
- Automotive Bodywork: Restoring car panels or custom bike frames benefits from TIG’s smooth, clean welds.
- Aerospace and Aviation Parts: Where strength and cosmetic quality can’t be compromised.
- Art and Sculptures: TIG offers the control needed to shape intricate metal art with neat welds.
- Food and Beverage Equipment: Stainless steel tanks and pipes need TIG’s clean, contamination-free welds.
- Pipe Welding: Especially for projects requiring strong, leak-proof joints in stainless steel or specialized alloys.
If your welding project is all about detail, thin metals, or visual quality, TIG’s precision makes it the clear choice.
When to Choose TIG Projects That Require Artistry Real World Tips
TIG welding shines when you need clean, precise welds with a smooth finish. Here are some real-world tips to get the most out of TIG for your artistic projects:
- Take your time: TIG is slower than MIG but lets you control every bead. Don’t rush; patience pays off with better-looking welds.
- Use the right filler: Match your filler rod to the material for seamless blends—stainless steel, aluminum, or thin metals all need different rods.
- Stay clean: Keep your metals and tungsten electrode free of dirt and oil to avoid contamination and weld defects.
- Master foot control: Practice the foot pedal to regulate amperage smoothly, especially on thin or detailed work.
- Keep your torch steady: A steady hand and consistent travel speed help maintain consistent weld quality.
- Work in a well-ventilated spot: TIG produces gases that need proper airflow for your safety and a stable arc.
- Use proper shielding gas: Argon is typically best for TIG, protecting the weld pool and giving that smooth arc stability.
If your project demands neat, strong welds on stainless steel, aluminum, or thin materials—especially when looks matter—TIG welding is usually the way to go. It’s perfect for art pieces, bike frames, and detailed fabrication where precision is non-negotiable.
MIG vs TIG for Beginners and Hobbyists Cost Portability and Learning Curve Entry Barriers Analyzed
When you’re just starting out or picking up welding as a hobby, the choice between MIG and TIG often comes down to cost, portability, and how quickly you can learn. MIG welding usually wins on the “ease of entry” front. The equipment is generally cheaper, simpler to set up, and more forgiving for new welders. Plus, MIG welders are often lighter and more portable, making them ideal for DIY projects around the garage or home.
TIG welding equipment tends to be pricier and bulkier. It requires more skill because controlling the tungsten electrode and adding filler separately takes practice. The learning curve is steeper, but the precision you get with TIG is worth it if you’re planning to work on thin metals or stainless steel with clean, high-quality finishes.
In short:
- MIG welding: Lower upfront cost, easier to learn, more portable, good for quick, strong welds.
- TIG welding: Higher cost, more complex setup, steeper learning curve, perfect for detailed, artistic work.
For beginners who want straightforward projects without breaking the bank, MIG’s simplicity and speed make it a friendly first step. If you’re aiming for precision and don’t mind investing more time and money, TIG is the way to go.
MIG vs TIG for Beginners and Hobbyists Cost Portability and Learning Curve Hybrid Options
If you’re just starting out or enjoy hobby welding, hybrid machines that combine MIG and TIG functions can be a great middle ground. These setups save space and money by giving you access to both welding processes in one unit. You won’t have to buy two separate machines or juggle different gear.
Hybrid welders often come with adjustable settings that make switching between MIG’s speed and TIG’s precision easier. This versatility is perfect for DIY fabrication welding projects where you might need both fast metal joins and delicate work on thin metals.
Keep in mind:
- Cost: Hybrid machines usually cost more upfront than a basic MIG welder but less than buying both MIG and TIG separately.
- Portability: These units tend to be heavier and a bit bulkier but still manageable for home garages or small workshops.
- Learning curve: You’ll need some patience to get comfortable with both processes, but having one machine to master can streamline your skill development.
For beginners who want to experiment with different welding types without investing heavily in multiple setups, hybrid options offer a flexible, cost-effective solution to build your skills and complete a wide range of projects.
Common Mistakes and How to Avoid Them in MIG vs TIG
MIG Pitfalls
When working with MIG welding, it’s easy to run into a few common issues if you’re not careful. Here are some typical pitfalls and how to steer clear of them:
- Poor Wire FeedIf your wire feed isn’t steady, your weld will look uneven or weak. Make sure your wire spool is installed correctly and the tension is just right—not too tight or loose. Regularly clean the feed rollers to avoid jams.
- Incorrect Voltage SettingsToo high or too low voltage messes with the arc stability. Always check your machine’s recommended settings based on the metal thickness and stick to those guidelines.
- Inadequate Shielding Gas CoverageIf the shielding gas flow is too low or your nozzle is dirty, you risk contamination and weld defects like porosity. Check for leaks, keep your nozzle clean, and set the gas flow between 20-25 cubic feet per hour (CFH) for most standard setups.
- Wrong Polarity SetupMIG welding usually works with DC positive polarity, but mixing this up can cause poor penetration or excessive spatter. Double-check your connections before striking the arc.
- Not Cleaning the MetalDirt, rust, or paint on the base metal can cause weak welds and more spatter. Always prep your metal surfaces properly before welding.
- Poor Joint Fit-UpIf your metal pieces aren’t properly aligned or have gaps, the weld won’t be strong. Take time to clamp and fit your pieces well.
Avoiding these mistakes will help you get cleaner, stronger welds faster, whether you’re working on steel or stainless steel welding methods. Keep these tips in mind, and your MIG welding projects will run smoother.
Common Mistakes and How to Avoid Them in MIG vs TIG
TIG Pitfalls
TIG welding requires patience and precision, but beginners often run into some common pitfalls that can slow progress or hurt weld quality. Here’s what to watch out for with TIG welding:
- Inconsistent torch angle: Maintaining a steady torch angle is key. Too steep or too flat can affect the weld bead and penetration. Keep it around 15 degrees off vertical for best results.
- Poor foot pedal control: Many TIG welders use a foot pedal to adjust heat, but it takes practice to get it right. Sudden changes in pressure can cause uneven welds or burn-through.
- Not cleaning the metal enough: TIG welds are very sensitive to contaminants. Dirt, oil, rust, or paint will ruin your weld and cause defects like porosity or weak joints. Always clean thoroughly before welding.
- Wrong tungsten setup: Using the wrong type or size of tungsten, or not sharpening it properly, leads to unstable arcs and poor weld quality. For most projects, a 2% thoriated or ceriated tungsten sharpened to a point works well.
- Improper shielding gas flow: Too low gas flow can let air in, causing oxidation. Too high can create turbulence and suck in contaminants. Aim for a steady flow—usually 15-20 cubic feet per hour (CFH).
- Overheating thin materials: TIG excels at thin metals, but it’s easy to burn through if you hold the arc too long in one spot. Use a steady pace and adjust amperage carefully.
Avoiding these pitfalls will give you cleaner, stronger TIG welds and save time fixing mistakes. Practice steady torch control, proper prep, and correct equipment settings to master TIG welding faster.
Common Mistakes and How to Avoid Them in MIG vs TIG Cross Process Advice
When working with both MIG and TIG welding, some mistakes pop up across the board. Knowing these common pitfalls can save you time, money, and frustration.
Watch your heat control:
- Whether using MIG or TIG, too much heat can warp your metal or burn through thin materials. Always test on scrap before starting your project.
- TIG welding is especially sensitive here since it’s used for precision work on thin metals.
Mind your cleanliness:
- Dirt, rust, and oil can wreck weld quality in both processes. Always clean your metals before welding to get a strong, clean bead.
- A simple wire brush or acetone wipe goes a long way.
Pay attention to your gas flow:
- Incorrect shielding gas flow causes porosity or weak welds in both MIG and TIG. Make sure your gas flow isn’t too low or too high—around 15-20 CFH (cubic feet per hour) is standard for most setups.
Keep a steady hand and arc length:
- Moving too fast or having an inconsistent arc length leads to bad welds in MIG and TIG. A smooth, steady pace improves penetration and appearance.
- TIG welding demands more patience here, so slow down to avoid mistakes.
Don’t rush your setup:
- Skipping proper machine setup and calibration hurts weld quality. Take time to dial in wire feed speed, voltage (for MIG), or amperage (for TIG) before tackling your project.
Use proper filler materials:
- Mixing up filler rods or wire that don’t match your base metal can cause weak joints. Stick to recommended rods and wire for each job.
By watching these cross-process basics, you’ll avoid common MIG and TIG headaches and get consistently reliable results—whether you’re welding steel, aluminum, or stainless steel.
Equipment Recommendations Building Your MIG or TIG Setup Starter Kits
If you’re gearing up to start welding, choosing the right starter kit is key. Whether you lean toward MIG or TIG, there are solid beginner-friendly packages designed to get you welding quickly without overwhelming you.
MIG Starter Kits
MIG welding kits usually include:
- A wire feed welder
- A spool of welding wire (usually mild steel or flux-core)
- A gas regulator and flowmeter for shielding gas
- A welding torch with cable
- Basic protective gear like a helmet and gloves
- Sometimes a clamp and ground cable
These kits are great for those who want fast, easy setup with reliable gas metal arc welding basics. Many kits cost between $200-$500, making MIG a budget-friendly option for DIY fabrication and simple home projects.
TIG Starter Kits
TIG starter kits typically come with:
- A TIG welder with adjustable amperage
- A tungsten electrode holder
- Tungsten electrodes in different sizes
- Gas hose and regulator for argon shielding gas
- A foot pedal for precise control (sometimes optional)
- Protective equipment like helmets and gloves
TIG kits tend to be pricier, often ranging from $500-$1,000. But this investment pays off for those focused on precision and cleaning up stainless steel welding methods or thin metals with finesse.
What to Look For
- Portability: If you plan to move around, consider compact and lightweight machines.
- Warranty and support: Look for brands with good local service in the U.S.
- Extras: Some kits include handy accessories like clamps or wire brushes, which are useful for beginners.
Choosing a starter kit that fits your project needs and budget can make your welding experience smoother and set you up for success from the beginning.
Equipment Recommendations Building Your MIG or TIG Setup Accessories Essentials
When you’re setting up your MIG or TIG welding gear, having the right accessories makes a huge difference. These essentials help you work safer, smarter, and get better results whether you’re welding steel, stainless steel, or aluminum.
MIG Welding Accessories
- Welding Helmet – Look for an auto-darkening helmet that adjusts to different light levels fast.
- Gloves – Heavy-duty, heat-resistant gloves to protect your hands.
- Wire Brushes and Chipping Hammer – For cleaning slag and prepping welds.
- Clamps and Magnets – Hold your metal steady and in the right spots.
- Gas Regulator and Flowmeter – To control shielding gas flow precisely.
- Spare Welding Wire – Keep wires matched to your metal type (steel, stainless, etc.).
- Ground Clamp – A solid ground is crucial for good arc stability.
TIG Welding Accessories
- Foot Pedal or Fingertip Remote – Control your heat and weld speed easily.
- Tungsten Electrodes – Different types for different metals (like thoriated, ceriated).
- Collets and Collet Bodies – Make sure you have the right size for your tungsten and torch.
- Argon Gas Supply – Clean, high-quality argon for smooth arcs and good penetration.
- Gas Lens – Helps improve shielding gas coverage for cleaner welds.
- Back Purging Kit – Protects the backside of stainless or aluminum welds.
Shared Must-Haves
- Safety Gear – Flame-resistant jacket, safety glasses, ear protection.
- Welding Cart or Table – Keeps your gear organized and portable.
- Wire Cutters and Pliers – For prepping and fixing your wire or tungsten.
- Welding Cleaner and Solvent – Good clean metal means better welds.
By investing in these accessories, you set yourself up for less frustration and more consistent welds. Especially in the US market where DIY jobs and professional projects vary, having the right gear tailored to MIG or TIG saves time and improves your overall welding quality.
FAQs Your Burning Questions on MIG vs TIG Answered
Which welding method is easier for beginners?
MIG welding is generally easier to pick up for beginners. It’s more forgiving and faster, making it ideal if you want quick results without a steep learning curve. TIG welding takes more practice because it requires better hand-eye coordination and control.
Can I weld thin metals with MIG or TIG?
TIG welding is your best bet for thin metals, especially stainless steel and aluminum. It gives you precision and control that prevent burn-through. MIG can work for thin metals too but often requires more skill to avoid damage.
What are the cost differences between MIG and TIG setups?
MIG welding machines and supplies tend to be less expensive upfront and cheaper to maintain. TIG setups are pricier, especially if you want quality equipment and the right accessories for precise work.
Which process is faster for completing projects?
MIG welding wins on speed. Its wire feed system allows for quick bead laying, making it suitable for larger projects or jobs where efficiency matters. TIG welding is slower but produces cleaner, more detailed results.
Do I need special gases for MIG and TIG welding?
Yes. MIG welding usually uses a mix of argon and CO2 to stabilize the arc and shield the weld. TIG welding relies mostly on pure argon for a clean, pinpoint arc, critical for high-quality, precise welds.
Are there hybrid options that combine MIG and TIG advantages?
Some welders offer multi-process machines that let you switch between MIG and TIG. These are great if you want flexibility without buying separate units, especially useful for DIY fabrication or diverse welding jobs.
What common mistakes should I avoid in MIG vs TIG welding?
- MIG pitfalls: Poor wire feed tension, wrong gas mix, and not cleaning metal surfaces can cause weak welds.
- TIG pitfalls: Inconsistent torch angle, wrong amperage, and poor filler rod control hurt weld quality.
Learning proper setup and practice is key.
These answers cover the basics to help you decide which process fits your needs—whether you want speed and ease or precision and detail.
Pick Your Winner and Weld On
Choosing between MIG vs TIG really comes down to what you need for your welding projects. If speed, ease of use, and cost-effectiveness are your top priorities, MIG welding is your go-to. It’s great for beginners and works well on thicker metals with faster results. On the other hand, TIG welding shines when precision and weld quality matter most, especially for thin metals or detailed work. It requires more skill and investment but delivers a cleaner, stronger finish.
For most DIY fabricators in the U.S., starting with MIG offers quick wins at a reasonable cost. But if you want to level up your skills and craft fine stainless steel or aluminum welds, TIG is worth the learning curve. Remember, both processes have their place—no one-size-fits-all here.
So, pick the setup that fits your current needs, budget, and future goals. Get comfortable with the tools, practice safely, and your welding game will improve fast. Whatever you choose, weld on confidently. The right method is the one that helps you create strong, clean joints every time.