Learn how to measure a screw thread accurately with easy steps using calipers and pitch gauges for DIY and professional projects.
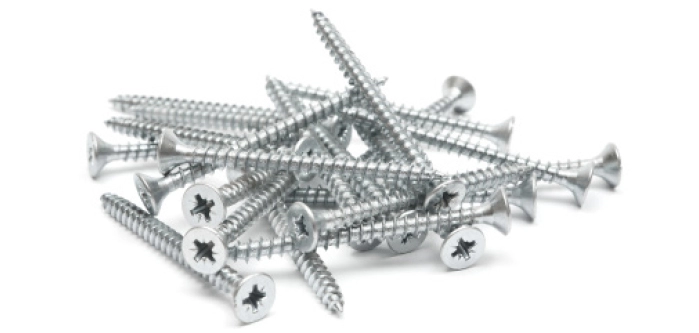
Ever stared at a drawer full of random screws and wondered how to measure a screw thread without guesswork? You’re not alone. Getting the thread size right isn’t just about convenience—it’s crucial for making sure your repairs hold strong, your projects fit perfectly, and you don’t waste time chasing mismatched fasteners. Whether you’re a DIYer, hobby machinist, or just tackling your next home improvement, knowing precise screw thread measurement tools and techniques can save you from costly mistakes.
In this quick yet complete guide, we’ll cut through the confusion and show you straightforward, expert-backed steps to measure screw threads accurately—no rocket science needed. From using digital calipers to identifying pitch with thread gauges, we’ve got you covered. Ready to master the skill that separates guesswork from precision? Let’s dive in and turn those mystery screws into perfectly matched parts.
Understanding Screw Thread Basics
Let’s start with the basics of screw threads to get you comfortable with the terminology and key features. A screw thread has several important parts: the major diameter is the largest diameter of the thread (usually the outer edge on external threads), while the minor diameter is the smallest diameter (often the root inside internal threads). The pitch refers to the distance between each thread crest. In the U.S., we usually measure pitch as TPI (threads per inch), while metric threads use millimeters to describe the distance between threads.
There are two main thread systems you’ll encounter: imperial (inch-based) and metric (millimeter-based). Imperial threads often follow standards like UNC (Unified Coarse) or UNF (Unified Fine), while metric threads align with ISO standards. External threads are the male ones you see on bolts and screws, and internal threads are the female ones inside nuts or tapped holes.
Here’s a quick comparison to keep handy:
| Feature | Imperial (UNC/UNF) | Metric (ISO) | Common Use |
|---|---|---|---|
| Diameter | Inches (e.g., 1/4″) | Millimeters (e.g., 6mm) | General machinery, automotive |
| Pitch | Threads per inch (TPI) | Distance in mm | Construction, electronics |
| Thread Type | Coarse (UNC), Fine (UNF) | Coarse/Fine variations | Depends on strength and fit |
Pro tip: Getting your measurements spot on isn’t just nerdy precision — it prevents frustrating issues like stripped threads or loose fits that can ruin your project and cost you time (and money). Accurate thread identification ensures parts fit perfectly, keeping everything tight and reliable.
Understanding these basics first sets you up for success when measuring or selecting the right screw threads. Ready to get hands-on with tools next?
Essential Tools for Measuring Screw Threads
When you’re just starting out, a simple ruler or tape measure can help estimate screw thread size roughly. To get accurate diameter measurements, digital calipers are your best bet. Models with 0.01mm precision are widely recommended because they make it easy to measure even the tiniest variations in threads.
For those who want to get more precise with thread pitch, leaf-style thread pitch gauges are essential. They help you quickly identify threads per inch (TPI) for imperial screws or match millimeter pitches for metric screws. Pair these with vernier calipers for measuring tricky internal threads inside nuts or holes.
If you’re working at a professional level, advanced tools like thread micrometers or optical comparators give you even better accuracy. Nowadays, smartphone apps that scan and analyze threads can be surprisingly helpful for quick checks on the go.
Here’s a quick budget vs. pro tool comparison:
| Tool Type | Cost Range | Best Use |
|---|---|---|
| Ruler/Tape Measure | $5 – $15 | Rough size estimates |
| Digital Calipers | $20 – $100 | Diameter & length measurements |
| Thread Pitch Gauge | $10 – $40 | Measuring TPI and pitch |
| Thread Micrometer | $100 – $300+ | Precise thread profile & diameter |
| Optical Comparator/App | Varies | High accuracy & quick analysis |
Safety tip: Always wear gloves when measuring threads, especially small ones, to avoid slips and keep your hands steady for the most precise reading.
Step by Step Guide How to Measure Screw Thread Size
Measuring a screw thread size can seem tricky, but breaking it down step-by-step makes it simple.
Step 1: Measure Overall Length
Use calipers to measure from the underside of the head to the tip of the screw. For most screws, this gives you the full length. Be aware of exceptions like countersunk or oval heads, where the measurement method changes slightly—using calipers helps keep it accurate.
Step 2: Determine Diameter
For external (male) threads, measure the major diameter—the outer edge of the threads. For internal (female) threads, measure the minor diameter—the inner edge of the thread groove. Use a caliper for accuracy, and compare measurements to an inch fraction gauge chart for imperial sizes or read directly in millimeters for metric. Avoid the common mistake of measuring the smooth shank instead of the threaded part.
Step 3: Identify Thread PitchFor imperial threads, count the number of threads over one inch to find Threads Per Inch (TPI).
For metric threads, measure the distance from crest to crest in millimeters.
Use a thread pitch gauge if you have one. If not, a ruler can help as a fallback by measuring the distance between thread peaks.Step 4: Check Thread Form and Fit
Ensure the thread angle matches standards by testing fit with a known screw or inserting gauge blades into internal threads. This helps confirm you have the correct thread type and reduces the chance of stripped or loose fittings.
Step 5: Decode Size NotationImperial examples: “1/4-20 UNC” means a 1/4 inch major diameter with 20 TPI, Unified National Coarse thread.
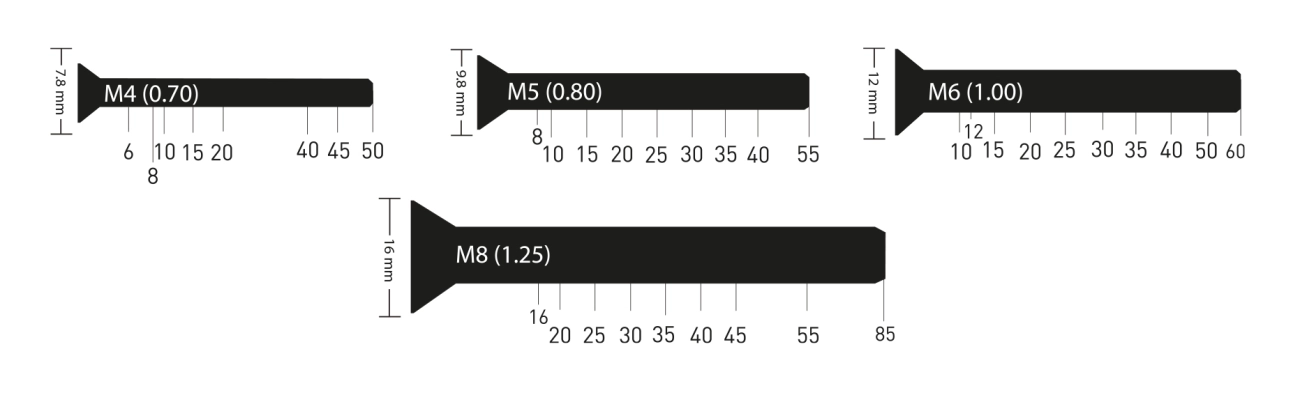
Metric examples: “M8x1.25” means 8 mm major diameter with a 1.25 mm thread pitch.
To convert TPI to pitch in millimeters, divide 25.4 by the TPI number.Troubleshooting
If your measurements don’t match common standards, consider if you’re dealing with tapered pipe threads or custom threads, which require different gauges or tools.
Visual Aids
For an easy reference, look for numbered images or video tutorials online that show each step in detail—they’re a great way to avoid guesswork.
This step-by-step method helps you measure screw threads accurately whether you’re working with imperial or metric standards, saving you time and avoiding costly mistakes.
Advanced Tips and Common Mistakes to Avoid
When you’re measuring screw threads for bigger projects, scaling up means using batch measuring jigs and digital logging apps. These tools help speed things up, keep your numbers accurate, and reduce mistakes when working with multiple screws or bolts.
Remember, different industries have specific thread tolerances. Wood threads, for example, are more forgiving than metal threads, which follow strict ASME or ISO standards. Knowing this helps you choose the right fit and avoid incompatible screws.
Common mistakes include mixing metric and imperial systems—never try to force a metric screw into an imperial hole or vice versa. Also, don’t overlook wear on older screws; damaged threads can give you wrong measurements and cause poor fits.
Pro hack: Save time by using a reliable thread ID chart like the vast thread ID chart. It’s perfect for quick lookups and helps you confirm sizes without guesswork or extra measuring. This kind of resource is a real time-saver, especially when dealing with mixed thread types.
When to Seek Professional Help or Upgrade Your Setup
Sometimes measuring screw threads yourself just isn’t enough. Here are signs you might need professional help or better tools:
- High precision needs: If you’re working in aerospace, automotive, or any field where exact fits prevent costly failures, DIY methods won’t cut it.
- Damaged or worn threads: Old or stripped threads can be tricky to measure accurately and may require expert repair or replacement.
- Custom or unusual threads: For non-standard or tapered pipe threads, professional services ensure you get the right specs without guesswork.
If you’re ready to upgrade, consider investing in pro-grade kits that offer advanced micrometers, optical comparators, and calibrated gauges designed for reliable, repeatable results.
For most DIYers and small shops, I recommend the vast thread measurement bundle. It includes key tools for accurate measuring, from digital calipers to pitch gauges—and right now, you can get free shipping on orders over $50.
Having the right gear and knowing when to call in the pros can save you time, money, and frustration down the line.