Discover what end milling is with this complete guide covering tools, processes, types, differences, and expert tips for precision machining.
End Milling Definition and Core Principles
End milling is a machining process where a rotating cutting tool removes material from a workpiece to shape or finish it. Specifically, an end mill has cutting edges on both the periphery (sides) and the end (bottom), allowing it to cut in multiple directions.
Technical Definition
End milling uses a multi-toothed cutter called an end mill, which spins around its axis to remove material by engaging both its side and bottom cutting edges. This enables operations like slotting, profiling, and face cutting in solid material.
How Material Removal Happens
- Peripheral cutting edges (side milling): These remove material along the side of the cutter, carving slots or shaping profiles.
- End cutting edges (plunge milling): These cut downward into the workpiece, ideal for cavities or pockets.
Milling vs Turning: Quick Visual Comparison
| Aspect | Milling | Turning |
|---|---|---|
| Tool Movement | Rotates and moves around workpiece | Rotates workpiece; tool is stationary or moves linearly |
| Material Removal | Uses multiple cutting edges (ends + periphery) | Uses single cutting edge along diameter |
| Typical Operations | Slotting, profiling, face cutting | Cylindrical shaping, facing |
| Workpiece Shape | Complex 2D/3D shapes, pockets | Mostly axial (round) parts |
End milling lets you work on complex shapes with precision by combining side and end cutting actions — a big step beyond simple turning.
How End Milling Works: Step-by-Step
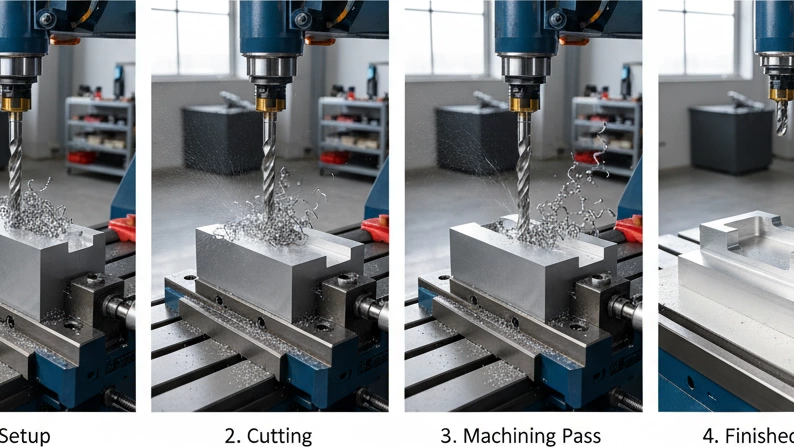
End milling starts with the end mill tool, which has several key parts. The flutes are the spiral grooves that help cut and clear chips. The helix angle controls how aggressively the tool cuts into the material and affects chip flow. Then, you have the shank, which is the part held by the machine, and the cutting diameter, which determines the width of the cut.
When it comes to axis movement, a standard machine might use 3-axis milling—moving the tool in X, Y, and Z directions. More complex setups like 5-axis milling add rotation and tilt, letting you cut from different angles for intricate parts.
End milling can follow two main approaches: climb milling and conventional milling. Climb milling pushes the tool in the same direction as the feed, resulting in better surface finish and longer tool life but needs a rigid setup. Conventional milling pushes against the feed, which can cause more tool wear but is safer on less rigid machines.
| Feature | Climb Milling | Conventional Milling |
|---|---|---|
| Tool Engagement | Starts deep, slices thin | Starts thin, slices thick |
| Surface Finish | Better | Rougher |
| Tool Wear | Less | More |
| Machine Rigidity | Needs more rigidity | More forgiving |
| Chip Evacuation | Efficient | Less efficient |
Chip formation happens as the rotating flutes shear off material, creating chips that must be cleared to avoid damage. Good chip evacuation is critical, usually achieved by the flute design and using coolant or air blasts to keep the cutting area clean.
Understanding these basics helps you get the most from end milling, whether you’re running a simple CNC or a sophisticated 5-axis machine.
End Milling vs Face Milling – Key Differences
End milling and face milling are two common milling methods, but they serve different purposes and deliver different results. Here’s a quick look at how they compare:
| Feature | End Milling | Face Milling |
|---|---|---|
| Cutting Direction | Uses the end and side of the tool | Uses the face (bottom) of cutter |
| Surface Finish | Better for detailed, precise cuts | Great for flat, smooth surfaces |
| Typical Tools | End mills (square, ball nose, corner radius) | Face mills (large diameter with multiple inserts) |
| Applications | Slots, pockets, profiles, contours | Large flat surfaces, leveling, facing |
| Tool Contact Area | Smaller contact, more versatile | Larger contact, faster surface removal |
When to Choose One Over the Other
- Choose End Milling when you need detailed shapes like pockets, slots, or 3D contours. It’s great for precision and intricate work.
- Choose Face Milling if you need to quickly flatten or smooth large surfaces. It’s efficient for high material removal rates on flat parts.
Knowing which method fits your job can save time, improve finish, and protect your tools from unnecessary wear.
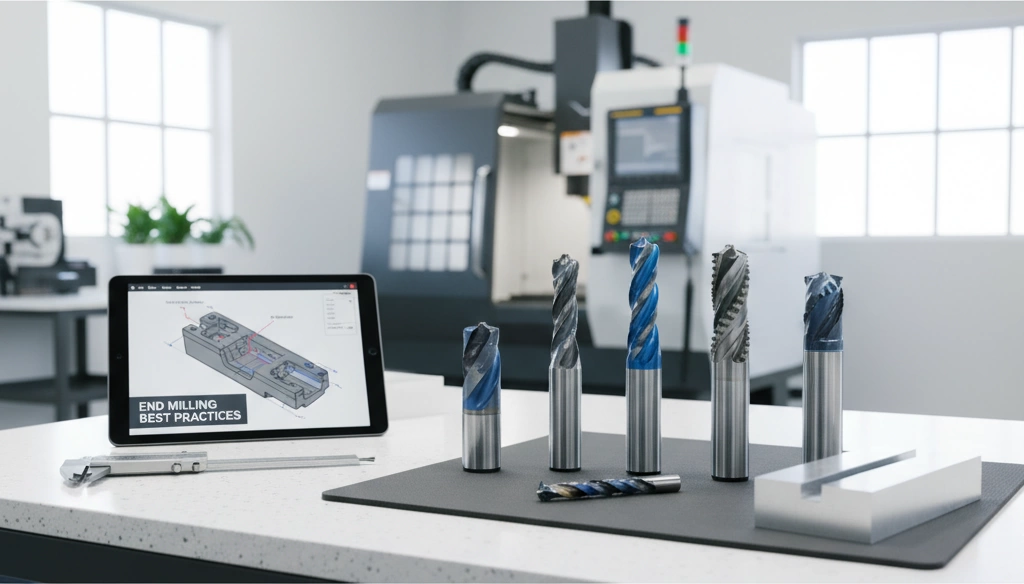
Types of End Mills (2025 Overview)
When it comes to end mills in 2025, there’s a solid variety tailored to different jobs. Here’s a quick rundown:
- Square End Mills: The most common type, great for general-purpose milling tasks like slotting and pocketing with sharp, flat edges.
- Ball Nose End Mills: Rounded tips perfect for 3D contouring and smooth finishes on curved surfaces.
- Corner Radius End Mills: These have a small radius on the corners, which adds strength and reduces chipping—ideal for tougher materials or longer tool life.
- Roughing vs Finishing End Mills: Roughing mills have serrated edges to remove large amounts of material fast but leave a rough surface; finishing mills are smoother and produce a clean, precise finish.
Flute Count: Choosing 2 vs 3 vs 4+
- 2-Flute End Mills: Best for softer materials like aluminum and plastics. The large flute space helps with chip removal and reduces clogging.
- 3-Flute End Mills: A good balance, often used in harder materials where better surface finish is needed without sacrificing chip clearance.
- 4+ Flute End Mills: Used for steel and harder materials where a smooth finish is critical. More flutes mean less room for chips, so these work best with chip evacuation methods.
Coatings for Longer Life
- TiAlN (Titanium Aluminum Nitride): Great heat resistance, suitable for high-speed steel and stainless steel.
- AlTiN (Aluminum Titanium Nitride): Even better for tough materials and dry machining.
- ZrN (Zirconium Nitride): Good for aluminum and softer alloys to help reduce buildup.
- Diamond Coatings: Mainly for abrasive materials like composites and carbon fiber to extend tool life.
Solid Carbide vs Indexable End Mills
- Solid Carbide: Highly rigid, long-lasting, and perfect for precision work on tough materials. Most popular for CNC end milling in the US.
- Indexable End Mills: Feature replaceable inserts, which lower costs on bigger jobs but may sacrifice some precision and can be bulky.
Picking the right type in 2025 boils down to your material, finish needs, and budget.
Common End Milling Operations
End milling covers a lot of ground when it comes to machining. Here are the most common operations you’ll run into:
- Slotting & Keyways: Cutting narrow channels or slots, often for keys that keep parts aligned or locked in place.
- Profiling & Contouring: Following a precise outline or shape on the workpiece to create complex edges or surfaces.
- Pocketing: Removing large areas of material inside a part, creating recessed pockets or cavities.
- Side Milling: Cutting along the side of the workpiece for smooth vertical walls or shoulders.
- Plunge Milling: Straight-down cutting into the material—great for making deep holes or starting pockets without ramping.
- Ramp Milling: Gradually entering the cut at an angle, reducing stress on the tool and workpiece.
- Trochoidal (High-Speed) Milling: Using a circular or looping toolpath to maintain a constant load on the cutter while aggressively removing material fast.
Each of these operations uses the end mill’s shape and movement in different ways, giving you flexibility to handle everything from simple cuts to intricate 3D shapes.
Materials Best Suited for End Milling
End milling works well on a wide range of materials, making it a top choice for many shops across the U.S. Here’s a quick look at what you can expect when milling different materials:
- Aluminum: Easy to machine and ideal for 2-flute or 3-flute end mills. Run at higher speeds and moderate feeds to keep chips flowing and avoid built-up edges.
- Steels: Use 4-flute or more for better finish and tool life. Slower speeds help reduce heat and wear.
- Stainless Steel: Tougher than regular steel, so you want coated carbide tools and slower speeds to prevent work hardening.
- Titanium: Demands tools with special coatings like TiAlN and low feed rates to handle heat and stickiness.
- Plastics: Can be tricky due to melting. Use sharp tools and control speeds to avoid chip welding.
- Composites: Require rigid setups and often specialized end mills to manage delamination or fiber pullout.
For exact speeds and feeds, checking tool manufacturers’ data helps dial in the right settings fast. If you want a quick tool recommendation or the best parameters for your material, the Vast tool selector is a handy resource to get the job done right.
Advantages and Limitations of End Milling
End milling is popular because of its versatility and precision. You can machine complex 3D shapes and tricky contours with ease, making it a go-to choice for everything from simple slots to detailed profiles. It works well on a wide range of materials, and the variety of end mill types means you can adapt quickly to different jobs.
That said, there are some challenges to keep in mind:
- Tool deflection: Because end mills are long and slender, they can bend under pressure, which affects accuracy.
- Chatter risk: Vibration during cutting can cause surface marks and reduce tool life.
- Higher tool wear: In tougher materials or aggressive cuts, end mills may wear out faster, especially if not using the right coating or geometry.
Knowing these pros and cons helps you decide when end milling is the best choice and how to set up your job for success.
Pro Tips for Perfect End Milling Results
Getting great results with end milling starts with fine-tuning your setup and technique. Here are some pro tips to up your game:
Control Tool Runout
- Keep runout under 0.0002″ whenever possible. This tight control reduces tool wear and improves surface finish. Too much runout causes uneven cutting and can ruin your tool.
Secure Workholding and Fixturing
- Make sure your workpiece is clamped firmly to avoid vibration or movement during milling. A solid setup minimizes chatter and helps maintain accuracy.
Choose the Right Cooling Method
- Coolant: Best for heat-intensive jobs and tougher materials.
- Air Blast: Great for removing chips without adding moisture.
- MQL (Minimum Quantity Lubrication): Efficient combo of oil and air, good for extending tool life while keeping the workspace cleaner.
Avoid Common Mistakes
- Don’t dwell too long in one spot; this causes dwell marks and tool damage.
- Avoid “burying the tool” by not plunging too deep or too fast without proper tool path strategy.
- Pay attention to helix direction to match your milling style—using the wrong direction can cause poor chip evacuation and surface finish.
By focusing on these details, you’ll get cleaner edges, longer tool life, and a smoother overall milling process.
Choosing the Right End Mill in 2025
Picking the right end mill can make a huge difference in your machining results, whether you’re working with aluminum, steel, or composites. In 2025, the trends lean toward more durable coatings, optimized flute designs, and versatile geometries that fit a wide range of jobs.
Vast’s current series focuses on high-performance carbide end mills, featuring options with TiAlN and AlTiN coatings for extra heat resistance and longer tool life. They’ve also improved flute designs to balance chip evacuation with surface finish, helping when you’re ramp milling or doing high-speed trochoidal cuts.
Here’s a quick checklist to help you choose the right end mill for your job:
- Material type: Match the end mill to what you’re cutting (aluminum, stainless, titanium)
- Number of flutes: 2-3 flutes for softer materials; 4+ for harder steels
- Coating: Pick based on heat and wear needs (TiAlN for tough jobs, diamond for composites)
- Cut type: Roughing vs finishing—select roughers for material removal, finishers for smooth surfaces
- Tool diameter and length: Make sure it fits the workpiece and machining setup
- Machine capabilities: Confirm tool is suitable for your 3-axis or 5-axis CNC setup
If you want an easy way to narrow down your options, Vast offers a free, printable tool selection checklist that breaks down these points and more. It’s a handy resource for anyone looking to save time and avoid costly mistakes on the shop floor.