Explore top reamers for precision holes in steel aluminum and stainless with expert tips on types speeds feeds and maintenance for perfect results.
Drill the hole. Ream the profit. If you’re fed up with oversized holes, bell-mouth disasters, or chatter that ruins your tools, you’re not alone. Reamers aren’t just another fancy tool—they’re the secret sauce for precision fit-ups and flawless finishes in Kansas City’s toughest shops. Whether you’re prepping for dowel pins, tackling 4140 steel, or hunting the perfect reamer near you, this quick read arms you with straight-talk advice and battle-tested tips. Stick around, and in 12 minutes you’ll know the right reamer types, speeds, and setups to stop scrapping parts and start running like a pro.
What a Reamer Is & Why Drills Alone Fail
Let’s cut to the chase: a reamer is a precision cutting tool used to finish holes after drilling. Unlike drills that carve out the shape roughly, reamers smooth, size, and polish that hole to exact dimensions with a clean, straight finish. Think of a drill as roughing out the hole, and the reamer as the guy who comes in to give it a fine tune.
Drilled vs. Reamed Holes: What’s the Difference?
- Drilled holes are usually slightly undersized, rough, and not perfectly round.
- Reamed holes hit tight tolerances with a smooth surface finish, consistent diameter, and correct roundness—perfect for press fits or anything needing a snug, reliable fit.
Hole Tolerance & Fit Table
| Hole Type | Typical Tolerance | Fit Type | Use Case |
|---|---|---|---|
| Drilled Hole | +0.010″ to +0.015″ | Loose fit | Simple clearance hole |
| Reamed Hole | ±0.0002″ to ±0.0005″ | Press or slip fit | Dowel holes, bushings, pins |
| Precision Bore | ±0.0001″ (with finish) | Critical fits | Aerospace or high-precision |
Real-World Demo: Carbide Reamer in 4140 Steel
Check out this quick clip—watch how a carbide reamer smooths out a drilled hole in tough 4140 steel. Notice the sharp, clean cuts and minimal chatter. Carbide’s hardness lets you run cooler and faster, making this combo a shop favorite for tough alloys.
Bottom line: If you want a hole that doesn’t just “fit,” but fits right, drilling alone won’t cut it. A good reamer is your straightforward route to precision, reliability, and less scrap.
Stay tuned for the next section where we break down the 8 reamer types you’ll actually use on the floor.
8 Reamer Types You’ll Actually Use
When choosing reamers, it helps to know the types that actually make a difference in your shop. Here’s a quick rundown of eight you’ll want on hand:
Chucking Reamers: Straight vs. Left Hand Spiral
cURL Too many subrequests.
cURL Too many subrequests.
cURL Too many subrequests.
cURL Too many subrequests.
cURL Too many subrequests.
cURL Too many subrequests.
cURL Too many subrequests.
cURL Too many subrequests.
cURL Too many subrequests.
cURL Too many subrequests.
cURL Too many subrequests.
cURL Too many subrequests.
cURL Too many subrequests.
cURL Too many subrequests.
cURL Too many subrequests.
cURL Too many subrequests.
cURL Too many subrequests.
cURL Too many subrequests.
cURL Too many subrequests.
Before you start, use a drill-to-ream size calculator. It helps pick the perfect drill bit size so your reamer removes just the right amount of material—not too much, not too little.
Stock Allowance Rules
Plan how much material to leave for the reamer:
- Steel: Leave about 0.002″ to 0.005″ (2 to 5 thousandths) of stock for reaming.
- Aluminum: Slightly more, around 0.003″ to 0.007″.
This ensures smooth cuts and prolongs tool life.
Speeds and Feeds Chart
Using the right speed and feed is key. Here’s a quick guide for common alloys:
| Material | Surface Speed (SFM) | Feed Rate (IPR) |
|---|---|---|
| cURL Too many subrequests. | 80-100 | 0.002 – 0.004 |
| Aluminum | 200-300 | cURL Too many subrequests. |
| Stainless Steel | 40-60 | 0.0015 – 0.003 |
Adjust these depending on reamer type and coolant.
Coolant Recommendations
Coolant helps prevent heat buildup and improves finish:
- Flood coolant: Best for steel and alloys, keeps temps low.
- MQL (Minimum Quantity Lubrication): Good for reducing waste and mess.
- Dry: Sometimes okay for aluminum or plastics but less common.
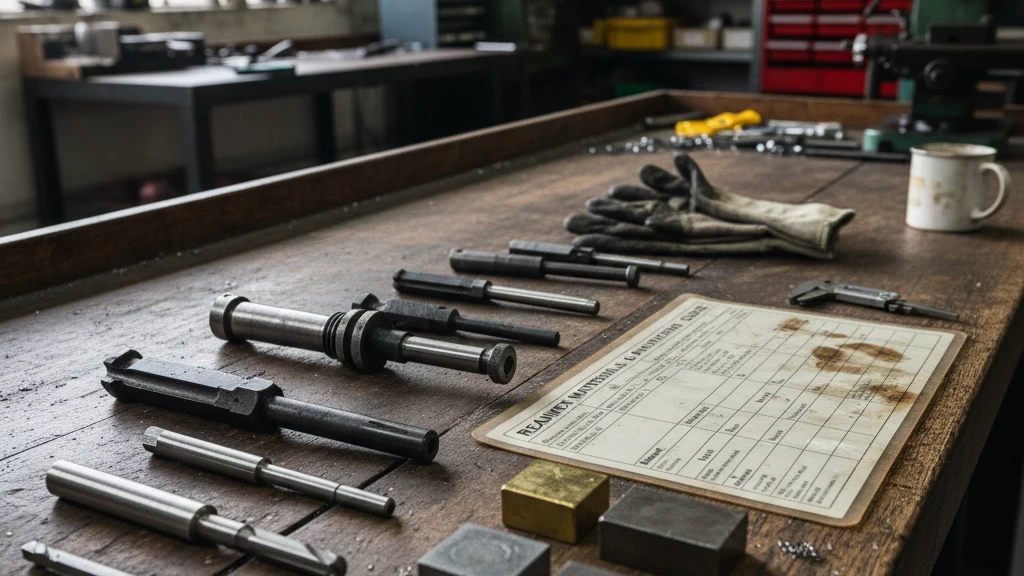
Photo Sequence: Spot Drilling to Deburring
- Spot drilling to start the hole precisely.
- Pilot drilling to the right pre-ream size.
- Reaming slowly, steady pressure, no rushing.
- Deburring the edges with a PVC or conduit deburr reamer for clean finishes.
Follow these steps and you’ll nail precision holes, whether working with steel beams in KC shops or aluminum parts anywhere in the US.
7 Deadly Reaming Mistakes & 1-Click Fixes

Reaming might seem simple, but small mistakes can wreck your work fast. Here are the top 7 blunders I see – and how to fix them without drama:
- Yanking the reamer out too fastMistake: Pulling the reamer back quickly causes chatter and damages the hole.
Fix: Retract the reamer slowly and steadily, letting it finish the cut smoothly. - cURL Too many subrequests.Mistake: Drilling too small or too big before reaming.
Fix: Follow a proper stock allowance chart: usually 0.002–0.005” more than final size for steel. Aluminum needs a bit more. - Using the wrong feed rateMistake: Feeding too slow or too fast causes chatter or dulls the tool.
Fix: Stick to recommended chucking reamer speeds and feeds, especially with materials like 4140 steel. - Skipping coolant or using the wrong typeMistake: Dry reaming hard metals can overheat tools; wrong coolant causes rust or poor finish.
Fix: Use flood coolant for harder steels, switch to MQL (minimum quantity lubrication) or dry for softer metals per guidelines. - Ignoring tool sharpnessMistake: Using dull reamers means poor finish and bigger holes.
Fix: cURL Too many subrequests. - cURL Too many subrequests.Mistake: cURL Too many subrequests.
Fix: cURL Too many subrequests. - cURL Too many subrequests.Mistake: cURL Too many subrequests.
Fix: cURL Too many subrequests.
cURL Too many subrequests.
cURL Too many subrequests.
cURL Too many subrequests.
cURL Too many subrequests.

cURL Too many subrequests.
cURL Too many subrequests.
cURL Too many subrequests.
cURL Too many subrequests.
cURL Too many subrequests.
cURL Too many subrequests.
cURL Too many subrequests.
- cURL Too many subrequests. when you notice:
- Increased cutting resistance
- cURL Too many subrequests.
- Vibration or chatter during use
- Replace your reamers if:
- They’re chipped, cracked, or excessively worn
- Sharpening won’t restore proper geometry or size
- The tool life limit recommended by the manufacturer is reached
Regular sharpening extends tool life and keeps your operation running smoothly, but at some point, replacement is more cost-effective.
Mail-In Sharpening Program
If you don’t have sharpening equipment on-site, consider a mail-in reamer sharpening service. You simply send your tools to a specialized facility where experts restore the cutting edges with precision. This saves you the hassle of investing in costly gear or risking improper sharpening that can ruin a reamer.
Finding a reliable local or national mail-in option is easy—just look for providers experienced with HSS, cobalt, and carbide reamers, especially if you’re working with tough materials like 4140 steel. This helps keep your reamers in good shape without downtime or guesswork.
Regular maintenance and timely sharpening cut down scrap, improve hole quality, and protect your investment.
Reamers FAQ: Your Top Questions Answered
Here are quick, practical answers to the common questions we get about reamers from folks across the U.S.:
Can you ream stainless steel dry?
Reaming stainless dry isn’t ideal. It generates high heat, risks work hardening, and dulls your reamer faster. Use a flood coolant or minimum quantity lubrication (MQL) to keep things cool and protect your tool.
What’s the best dowel pin reamer?
Look for a precision ground carbide or cobalt chucking reamer with tight tolerances that match dowel pin hole tolerance specs. A left hand spiral flute reamer helps clear chips better in blind holes. That combo will give you clean, accurate fits.
How do I fix reamer squeal?
Reamer chatter or squeal usually means you’re feeding too fast or the spindle speed is off. Try these fixes:
- Slow your feed rate slightly
- Adjust spindle speed to the recommended chucking reamer speeds feeds table
- Use flood coolant to reduce vibration
- Check your setup for misalignment or worn bearings
Can I use an adjustable hand reamer for steel and aluminum?
Yes, but stock allowance matters. Follow the reamer stock allowance chart—slightly more material for steel than aluminum—to avoid chatter and ensure a smooth finish.
When should I replace vs. sharpen a reamer?
If your reamer shows chipped edges, excessive wear, or poor finish after sharpening twice, it’s time to replace. Otherwise, a mail-in sharpening program can give your HSS or cobalt reamers a new life.
Keep these tips handy, and you’ll get the best from your reamers every time.